
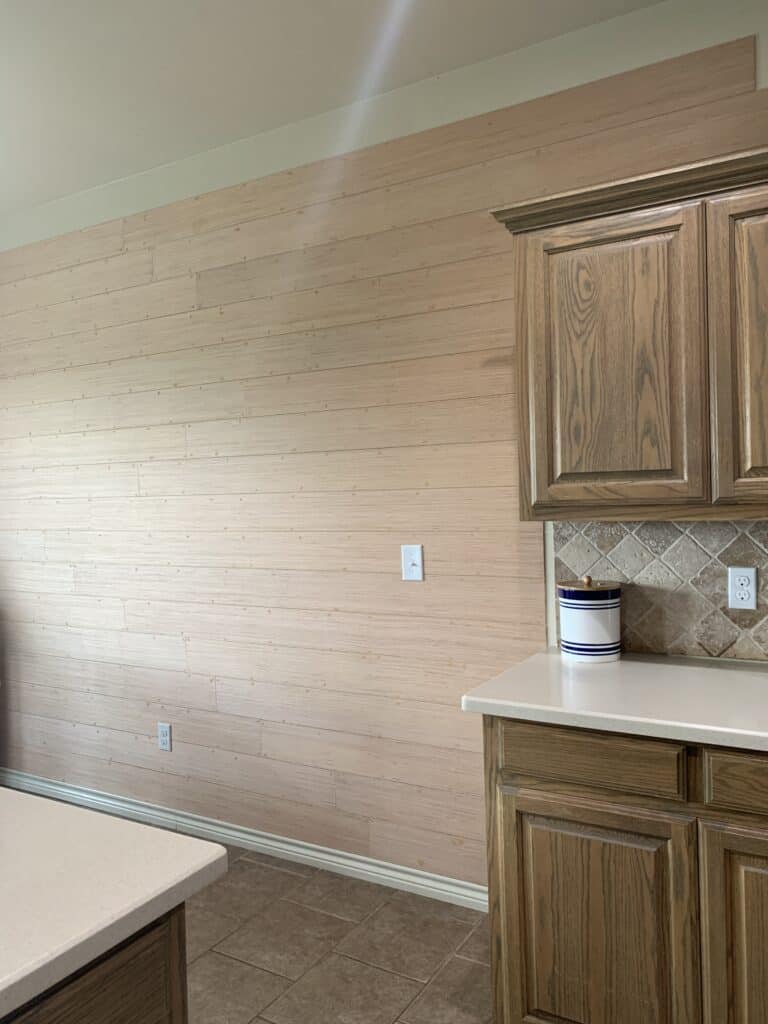
A faux shiplap wall is a cost-effective and easy way to add a touch of rustic charm to your home. This beginner accent wall will add character to your space for a fraction of the cost of other options to shiplapping a wall.
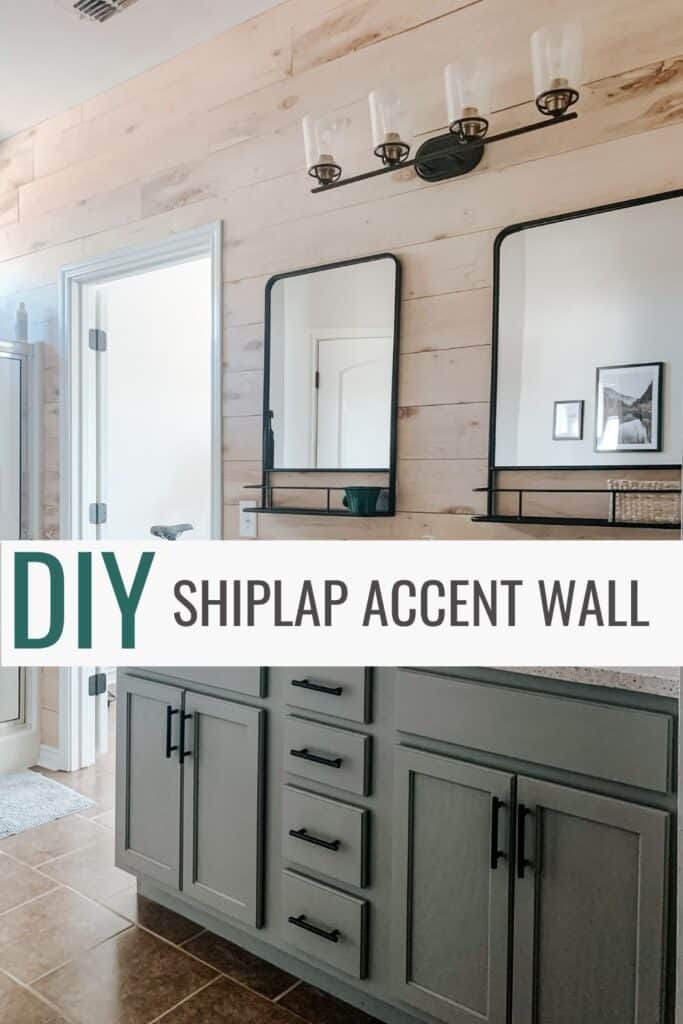
I am no stranger to a good diy shiplap wall. In our Texas fixer upper I knew I needed to add some character but on a budget. Knowing we were only going to be living in the home for 3 years I needed to update the space but in a cost-effective way.
What Can I Use For Faux Shiplap?
There are so many ways to “shiplap” a wall. Some use the sharpie method and draw on the lines, others use tongue and groove pine or mdf boards to create the look of shiplap. All methods are great and are usually much cheaper than true shiplap but, today we are going to talk about how you can use 1/4 inch underlayment plywood.
By using underlayment plywood you are cutting your cost down significantly. At the time of this post (1) 4 FT x 8 FT sheet of poplar sanded plywood runs about $27 a sheet. You can get (8) 6 IN X 8 FT faux shiplap boards out of one sheet. Where as a 8 FT tongue and groove board runs about $10 a board.
Tools & Supplies List
Tools & Supplies you’ll need
[AFFILIATE LINKS ARE PROVIDED BELOW FOR CONVENIENCE. FOR MORE INFORMATION SEE MY DISCLOSURE HERE.]
When purchasing your plywood at Lowe’s or Home Depot you can actually have them rip down the plywood into whatever size you desire. We chose to go with 6 inches strips. Most common sizes are 6 and 8 inches. You can also use a table saw or circular saw to trim your own boards if you like.
How To Make a Faux Shiplap Wall
Step One: Determining How Much Plywood You Need
First step, before running off to the hardware store measure the wall you want to cover with shiplap. Then determine how many sheets of plywood you will need. Don’t forget to take inventory of all other supplies you might need from the list above.
One thing I dislike the most is having to take more than one trip to the hardware store.
Step Two: Prepping Your Wall & Shiplap Boards For Install
Once you have all your shiplap boards home and cut down to size, you are going to sand all the rough edges. When plywood is cut it typically leaves splinters and some split ends. The easiest way is to run a sand block over the edges or use a palm sander to rid the boards of splinters.
Time Saving Tip: Paint your boards before install to save some time. You will still need to do touch ups but, it’s so much faster to do before hand.
After the boards are all prepped and ready to be installed you will need to make sure your walls are ready. Make sure the wall is free of any wallpaper or if you have a color on the wall I would suggest painting it white.
When installing shiplap you will see just ever so slightly in between the boards. Any crazy bold color will be noticeable through the cracks. Taking your stud finder along the length of the wall, mark where all your studs are. Take a level and draw a line down the wall showing where your stud is located.
This will help you know where to nail your boards.
Step Three: Installing Faux Shiplap Boards
There is no right or wrong when it comes to installing your first board. You can either start installing at the top of your wall and work your way down or some prefer to start at the bottom of the wall and work their way up.
If you start at the bottom of your wall you can either place your first plank on top of your old baseboard or remove your existing baseboard and reinstall on top. Or another option is to add new baseboards just to the accent wall.
If you have a wall longer than your board make sure you are staggering your shiplap pieces. Don’t but a 6 FT piece up and then another 6FT piece of the same size underneath it. Trim it down by a foot or so to give it a staggering effect. If you have to nail where there is no stud you can criss cross your nails. Coming in from an angle from the right and then coming in from an angle from the left will help hold it in place.
Shiplap Tip: Some people love to use liquid nails when installing shiplap. I ONLY use liquid nails if it is behind a toilet or I know there is a water pipe nearby and I don’t want to risk nailing to close to it. Liquid nails will damage your drywall if you ever decided to pull off the shiplap.
When putting your wall together this is where your going to need a few nickels. Use your nickels as spacers to create that small gap in-between your boards. If you don’t use the nickels as spacers than your entire wall will not resemble shiplap, it will be just one flat wall with no dimension.
Once you get going it’s actually really easy. The hardest parts will be any outlet covers you encounter. If you have special cuts like electrical outlets, light switches or door frames use a jigsaw to help cut those out.
Step Four: Finish Work & Painting Your Shiplap Wall
Step four is probably the most tedious and boring step but this is where the magic happens. You will need your putty knife and wood filler to start out.
I prefer to fill all my nail holes when I’m doing shiplap but others prefer the rustic look of the nail holes. Whatever you choose it will look great! If you are filling your holes this is when you will do it. First, fill all your nail holes and caulk any seams against the wall. After all that is dry go in with a sand block or palm sander and file all the wood filler off that needs to be sanded.
Sanding plays a crucial role in achieving a flawless finish for your shiplap wall by removing imperfections and creating a smooth base for paint. It is essential to ensure that the paint adheres well and provides an even and professional-looking result.
By removing these flaws, you create a clean canvas for the paint to adhere to, preventing any visible bumps or rough areas. To sand your shiplap planks effectively, I suggest using 220 grit, for a smooth finish.
After sanding, wipe away any dust with a damp cloth or vacuum before proceeding with painting.
Tips for Choosing the Right Paint for Your Shiplap Wall
Here are some articles that correlate with choosing the right paint and the right paint finishes for your accent wall!
When painting your planks you might get paint in between your boards. To clean out the gaps I would suggest using a old credit card or some stock paper to swipe in the cracks afterwards.
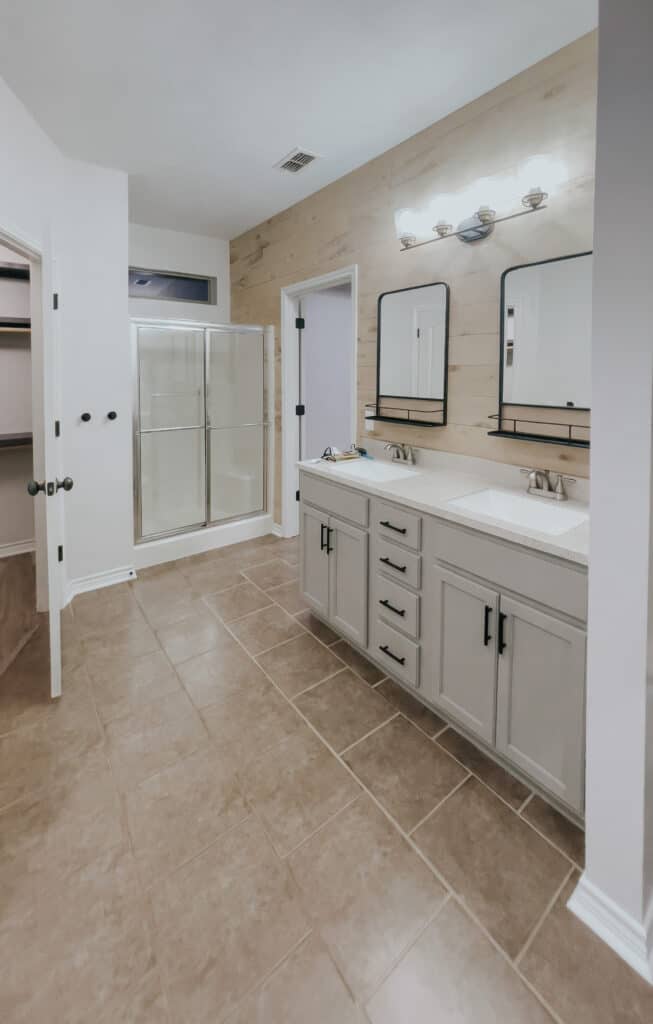
After the painting is done, you can decor your little heart out! I hope this tutorial motivated you and encouraged you to get started on your new fake shiplap wall.
The satisfaction of stepping back and seeing your completed project will be well worth the effort. So, roll up your sleeves, grab a paintbrush, and dive into this exciting DIY endeavor. You’ve got this!

[Safety is of great importance when working on DIY projects. Always follow proper safety guidelines, wear appropriate personal protective equipment, and adhere to local building codes and regulations. READ MY FULL DISCLAIMER HERE.]