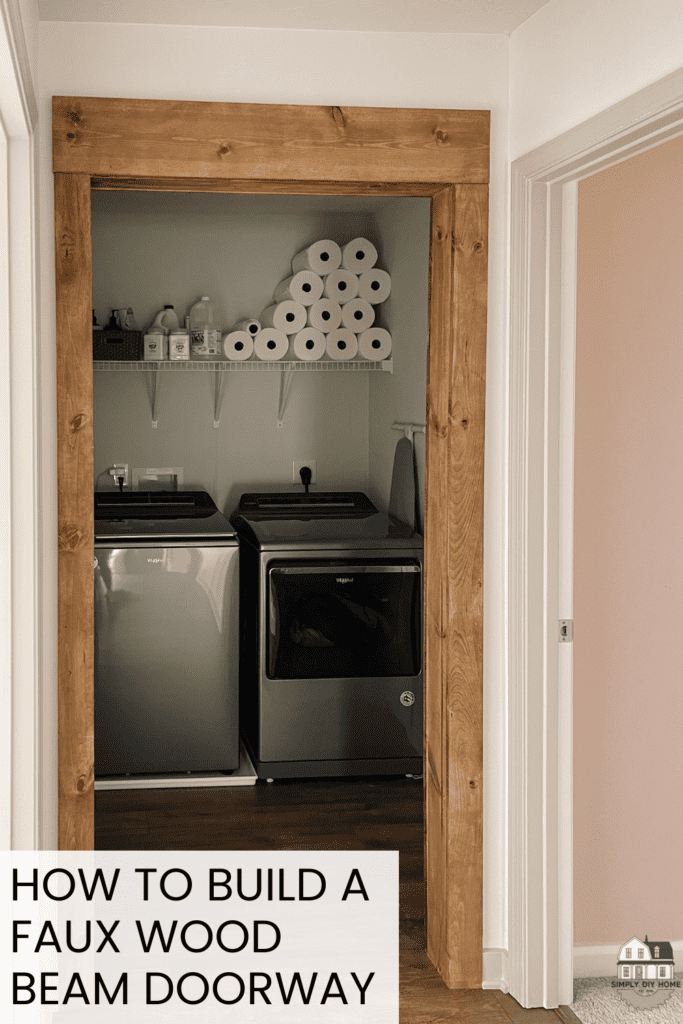
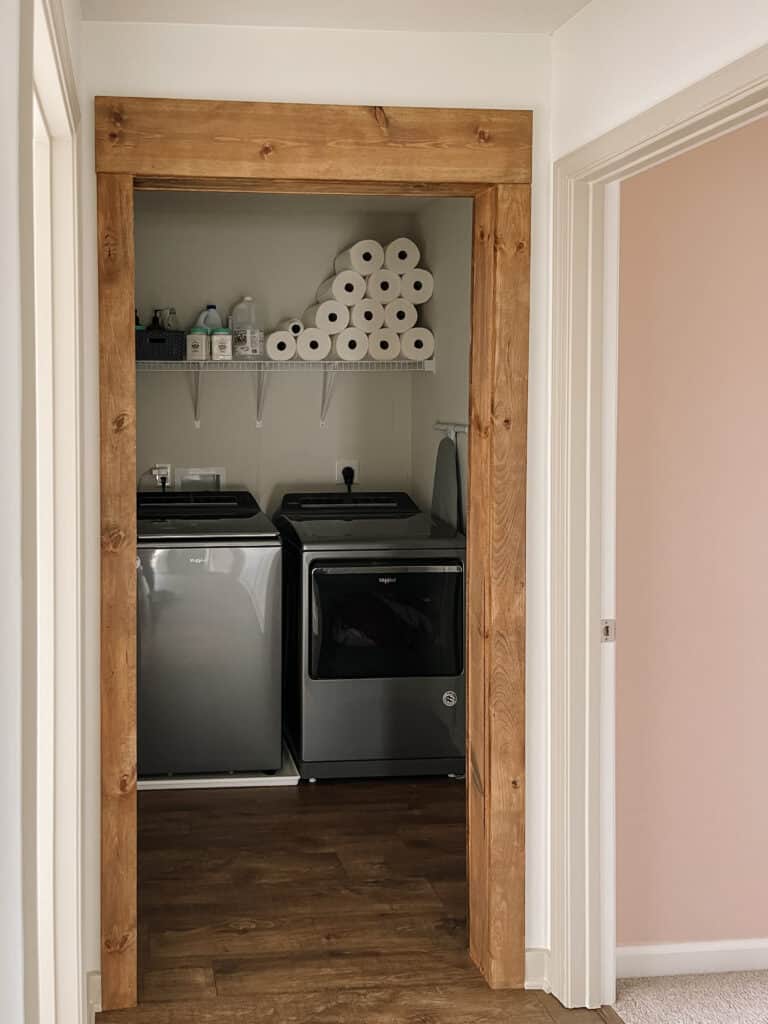
In this article we go in-depth to building a faux wood beam doorway!

The year started off with new floors in our loft/hallway upstairs! While installing the floors we were reaching the end and a little over it. My husband was having the hardest time with the laundry room doorway, that we had the idea of just ripping off the door casing to make it easier.
I know that seems a little extreme but I had taken the door off months ago and just planned on filling the door hinge holes. After removing the casing I was searching for some inspiration on Pinterest and thought why not add faux beams to the door opening!
So, that’s exactly what we did. Let me show you!
[AFFILIATE LINKS ARE PROVIDED BELOW FOR CONVENIENCE. FOR MORE INFORMATION SEE MY DISCLOSURE HERE.]
Tools & Shopping List
Recommended Tools
- Brad Nailer
- Bubble Level
- Miter Saw
- Table Saw
- Measuring Tape
- Utility Knife
- Hammer & 5 in 1 Tool
- Palm Sander
- Rag or Staining Pad
Shopping List
- Brad Nails
- Sandpaper
- Stain Of Your Choice
- Pre-Stain Conditioner
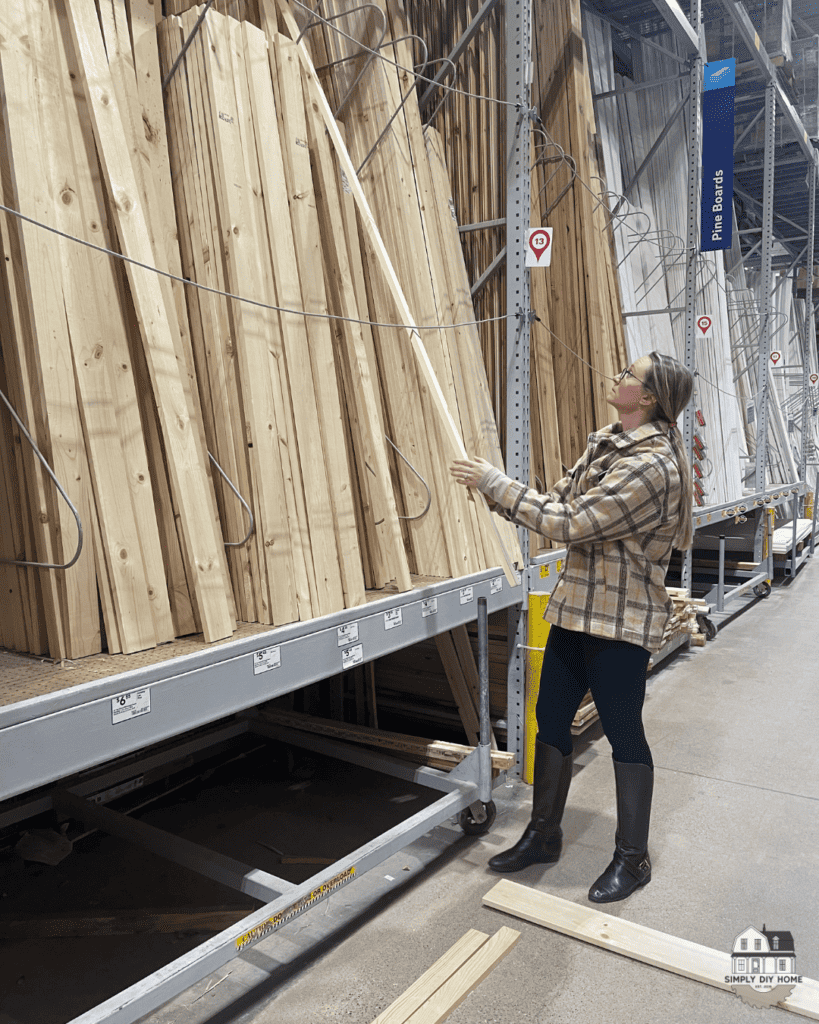
- (4) 1x4x8 Unfinished Whitewood Board
- (1) 1x8x8 Unfinished Whitewood Board
- (3) 1x6x8 Unfinished Whitewood Board
Dimensions
The overall dimensions of my doorway was 36 3/8″ wide and 81 1/2″ tall.
Keep in mind the dimensions of my doorway could be different from yours. I actually have many different size doorways in my home. So these plans for the faux barnwood door frame can be customized based on the width of your doorway.
Total Cost Of Wood Beam Door Frame
At the time of this project (January 2024) it cost me less than $60! The 8 pieces of wood that I purchased from Lowe’s cost me a total of $57.20! I already had the stain and pre-stain conditioner so if you don’t own those things already you will have to buy them.
How To Build A Faux Wooden Door Frame
Remove The Existing Door Casing
First step, to building your new wood door opening is to remove the existing door casing. Depending on how well the builder installed your door casing this could be simple or it can be a pain in the butt!
I don’t have pictures of this step because my husband got to it before I could. All you need to do to remove the door casing is take a utility knife and score the caulk on the edge of your door trim. Once that’s done take the end of your 5 in 1 tool and push it behind the door trim.
Sometimes you have to take your hammer and lightly tap on the end of your 5 in 1 tool to get it behind the trim. When it’s behind the trim lightly pry the trim off. Do this all the way around the door.
Once that is off you will do the same with your door casing! This might be a little harder due to most builders will use heavier duty nails to hold the casing in.
Measure, Cut & Dry Fit Your Boards
After the door casing and trim was removed I went ahead and measured the inside height and width of the opening. Then, I measured the outside area where the 1×4 trim would go.
For us we had to use our table saw to trim down the inside 1×6 trim. The width of that area ended up being 4 3/8″. The 1×6 was 5 1/2″ so we needed to take some off for it to fit.
If your not familiar with nominal and actual lumber sizes you can read all about it HERE and download my free lumber size chart!
This is a personal preference but I highly suggest staining your boards first before you install them. If you stain all your boards first then cut them you will most likely have a little bit of splittering on the ends that need sanded. So, doing all the cutting first made makes more sense.
To figure out the dimensions for cutting I go into more detail in the install portion of this article.
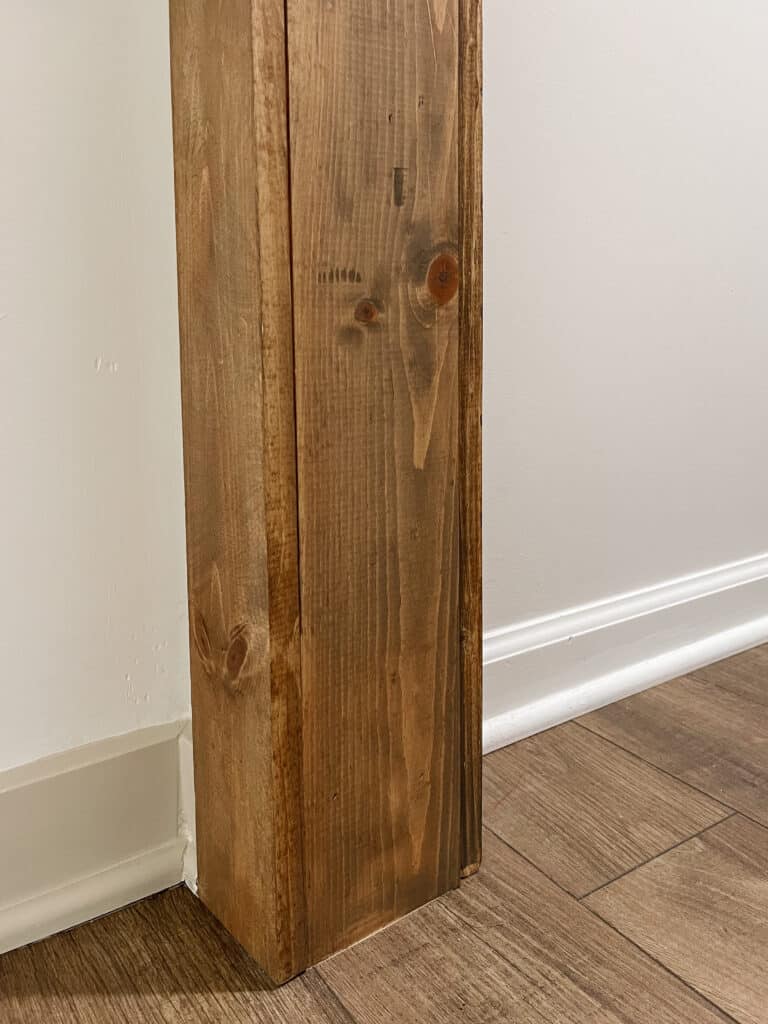
Stain & Distress Barnwood Trim
Before installing the trim and door casing stain the boards first. I didn’t stain the inside trim before installing and I had to be careful not to get stain on our new floors. It just makes life easier if you stain them beforehand like I did with the outer trim.
Before staining you will want to sand your boards. Sanding removes any protective coating while opening up the pores for maximum stain penetration. If you don’t sand then you will get uneven, blotchy, and dull results.
Once, everything is sanded I start with a pre-stain conditioner. This will help prevent streaking and blotching and help ensure a beautiful, even stain.
As for stain color I use a custom combo of Briarsmoke and Early American together. If your interested in my method to get my favorite stain combo you can read How To Stain Wood: My Special Stain Combo.
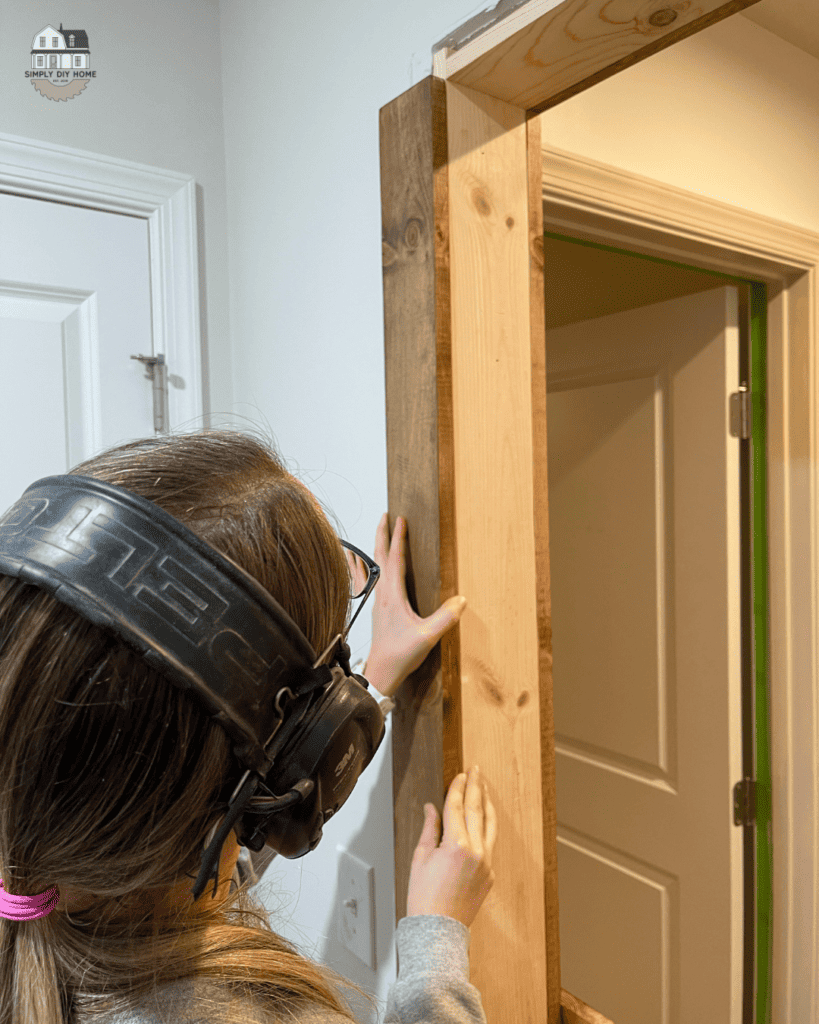
Install The Barnwood Trim & Casing
Once, all the wood is dry (or not dry, I usually am too impatient to wait for it to dry) you will start by installing the outer 1×4 trim. It’s kind of tricky but when you go to install take your inner 1×6 trim piece and dry fit it in place. You want to do this because your trim piece will overlap your 1×6. The picture down below better shows what I’m trying to explain.
When you have the 1×4 trim where you need it use your nail gun to secure it to the wall. After those are on you can install your top 1×8 piece right on top of those.
Next, you will mount the inner 1×6 trim by first installing the sides and then attaching the top piece using a nail gun. Finally, don’t forget to install the trim on the opposite side of the doorway.
Cut Baseboard And Reattach
Almost done! If you had existing baseboards there is a good chance you might have to recut them just a tiny bit and reinstall. Ours was just 1/2″ to long so we trimmed it down and added it back to the wall!
This project let alone made a huge difference in our hallway. I love the character it brings to the space, not to mention how much more open it feels up here! If you end up adding a faux wood beam doorway in your home send me pictures over on Instagram or Email me at [email protected].
Happy Building!

[Safety is of great importance when working on DIY projects. Always follow proper safety guidelines, wear appropriate personal protective equipment, and adhere to local building codes and regulations. READ MY FULL DISCLAIMER HERE.]