
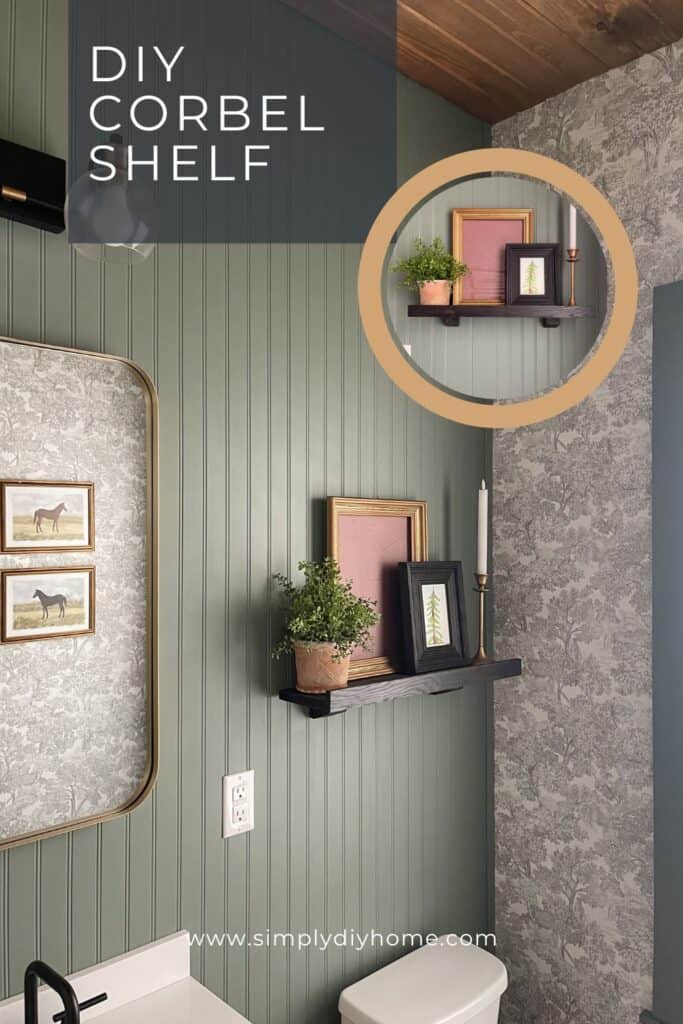
If you’re looking for a budget-friendly and stylish way to add some storage space to your bathroom, this project is perfect for you. This simple yet beautiful corbel shelf is not only functional but also provides a touch of elegance and charm to any space.
In this post, I’ll guide you step-by-step on how to create your own simple corbel shelf, using readily available materials and basic tools.
With the half bathroom makeover coming to an end it was time to figure out our shelf situation. If you have been following along over on Instagram you would know this has been 3 months in the making.
I tend to take my time on DIY projects, especially room makeovers. I want everything to feel like it belongs and that I’m going to truly love what I am creating in our home. The details are so important with every project!
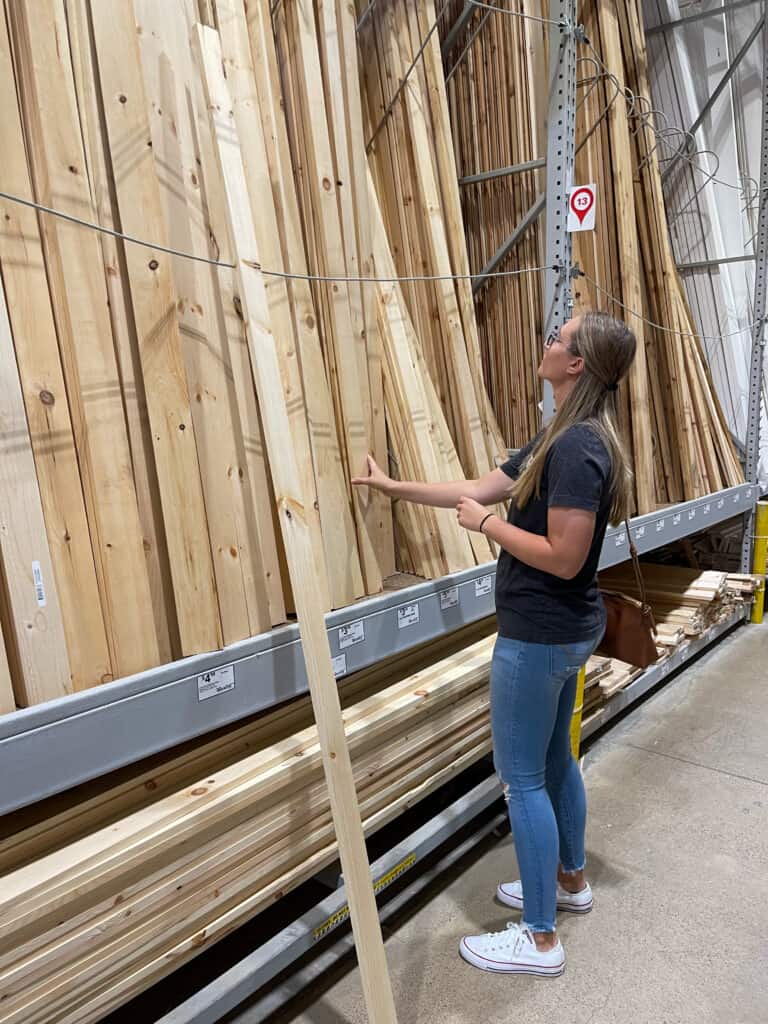
I knew I wanted a shelf above the toilet in our half bathroom, but was stomped on where to find the right one. I envisioned a floating shelf with some character, colored in black semi-transparent stain. Literally, after searching for hours at Target, Home Goods, Magnolia and Amazon I found one.
But, there were some downfalls to this shelf I found. The wood tone wasn’t right, and the reviews were mixed on whether the shelf color was right in the photo. The width of the shelf was a joke.
There was no way you were storing anything on that shelf in a bathroom except photos. And lastly, it was $25. If you know me I have a made up price point in my head at all times on what I will spend on one given item. $25 was too high for me when it didn’t even check all my boxes.
The design looked super simple. I thought to myself “Why don’t I just make this exact shelf but change the dimensions to my needs?” For less than $25 I was about to do that, and I’m going to share my woodworking plans with you for FREE so you can too!
Alright, now let’s start DIY-ing!
[AFFILIATE LINKS ARE PROVIDED BELOW FOR CONVENIENCE. FOR MORE INFORMATION SEE MY DISCLOSURE HERE.]
Recommend Tools:
- Brad Nailer or Finish Nailer
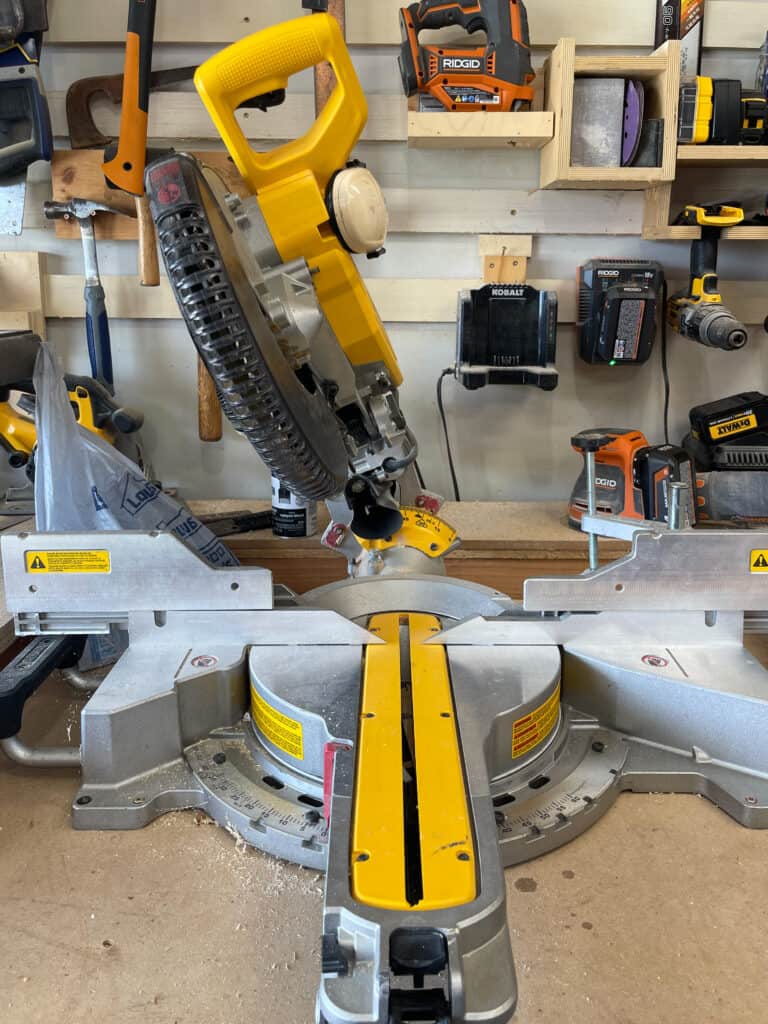
- Miter Saw
- Orbital Sander
- Measuring Tape
- Pencil & Speed Square
- Safety Gear- Ear & Eye Protection
- Drill & Countersink Bit
Shopping List:
- (1) 1x6x2 Red Oak Board
- (1) 1x2x2 Red Oak Board
- (1) 2x2x3 Red Oak or Poplar Board (See disclaimer down below)
- (1) 1/4x2x2 Red Oak Board or scrap plywood.
- Stain of your choice (I used True Black Semi-Transparent Water Based Stain from Minwax)
- Pre-Stain Wood Conditioner-Water Based
- Wood Glue
- Wood Filler
- 120 Grit Sandpaper
- 1 1/2″ Brad Nails
- 2″ Screws (I love the PowerPro Brand)
Disclaimer About The Corbels
When buying lumber for the corbels, I used the poplar 2x2x3. It was something I had on hand when making my first shelf. Fast forward to when I made a second shelf for my mom, I went to Lowe’s to buy all the lumber including a red oak 2x2x3 this time around.
For some reason the 2x2x3 poplar board was exactly 2x2x3. Even though online it states differently. The red oak board was actually 1.5×1.5×3. Which if you are aware of how to read lumber sizes then you know that the poplar board is not typical.
I personally love the look of the thicker corbels, so I continued to use the poplar board I had at home. Just beware if you buy either of these, you should check them in store. I don’t know if I got a mess up or what.
You can download my lumber size chart here for free.
Dimensions
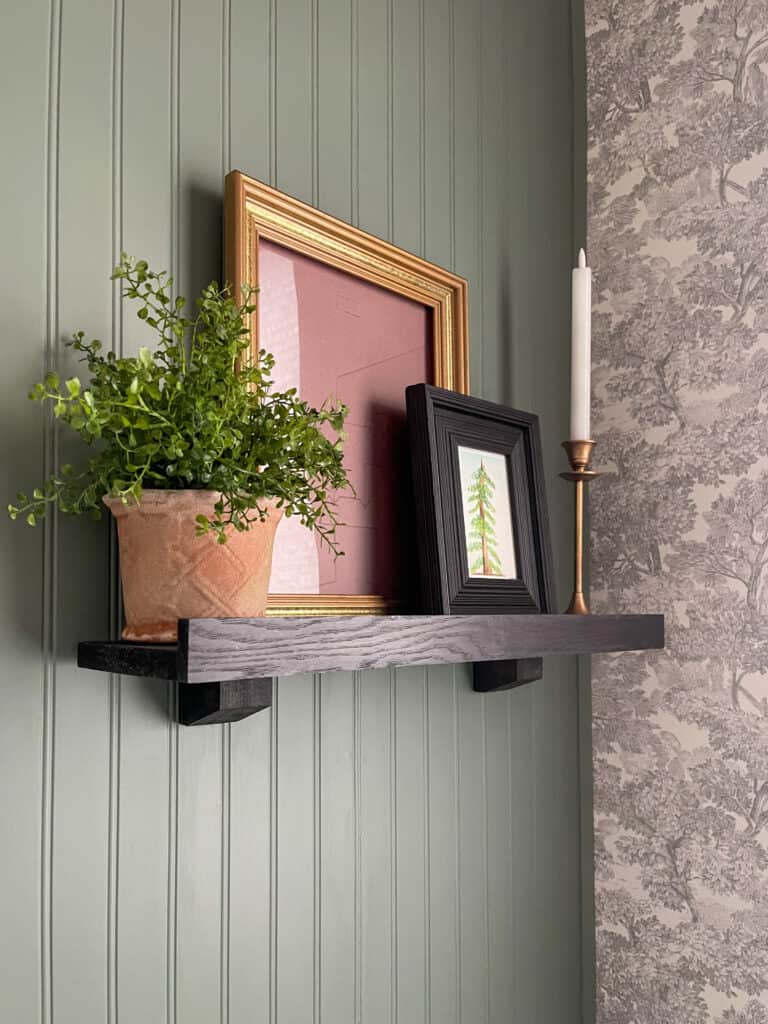
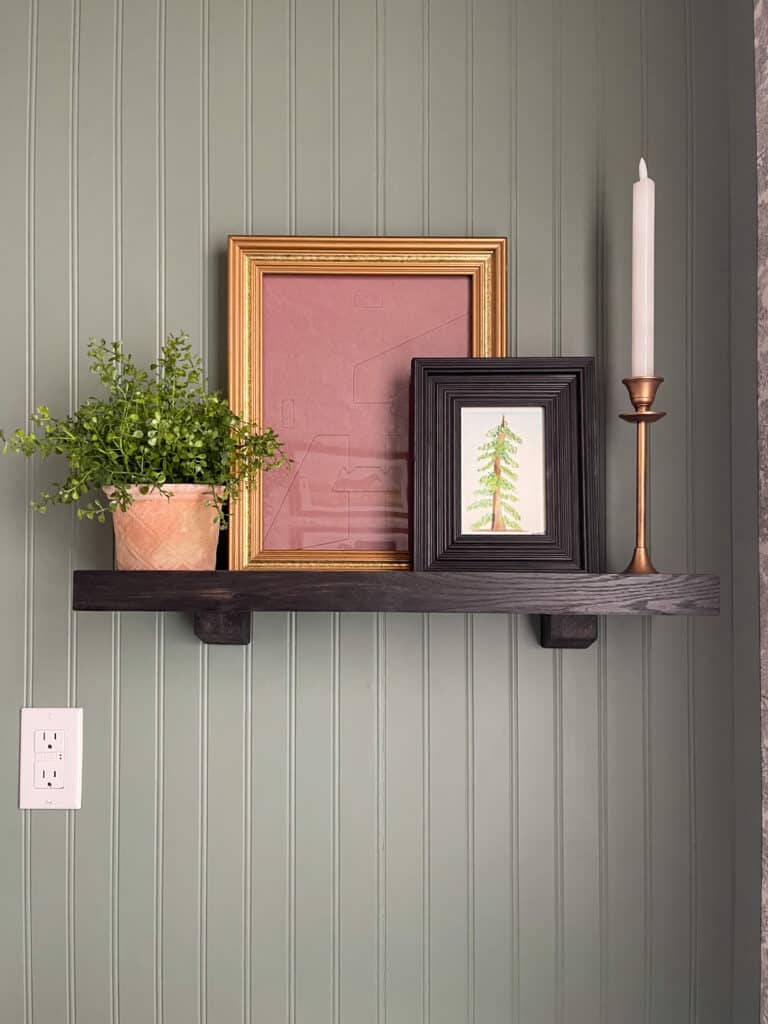
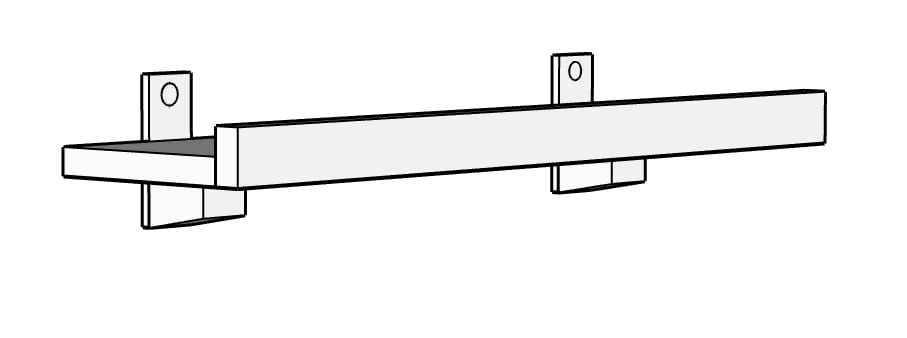
The final dimensions of this simple corbel shelf is 24″ W x 6 1/4″ D x 2 1/4″ H.
Total Cost of DIY Corbel Shelf
The total cost of the corbel shelf all depends on what you have on hand. At the time of writing this article the wood cost a grand total of $32. There are ways to save money by using poplar or even pine wood.
About 90% of my projects I use pine wood! But, for this project I wanted the look of oak.
If you don’t have a stain or pre-stain conditioner on hand they come out to be $35 for the two.
Since I have been DIY-ing for years I actually had everything but 2 of these boards on hand. Which means I only paid $15 to build at the time.
Different Wood Types Cost Breakdown
- OAK: $32
- PINE: In theory pine should be cheaper. I couldn’t figure out a price breakdown. If you go to Home Depot you can trim the boards to the exact length you need and buy that way.
- POPLAR: $21
How To Build A Simple Corbel Shelf
Prefer to have printable plans? I got you covered! For a limited time I am offering the simple corbel shelf plans for FREE!
Step One: Make Your Cuts
If you bought the lumber from the list above in red oak or poplar, in the exact sizes I listed, there won’t be many cuts you will need to make.
The only cuts you need to make are the corbel feet and the bracket for hanging purposes.
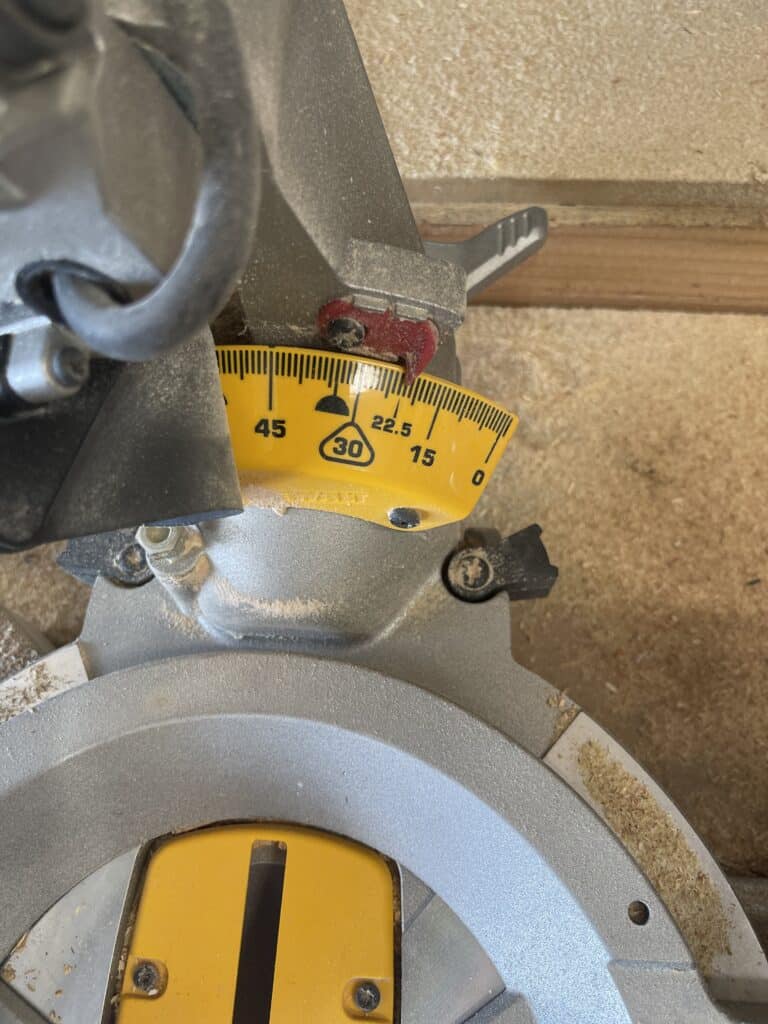
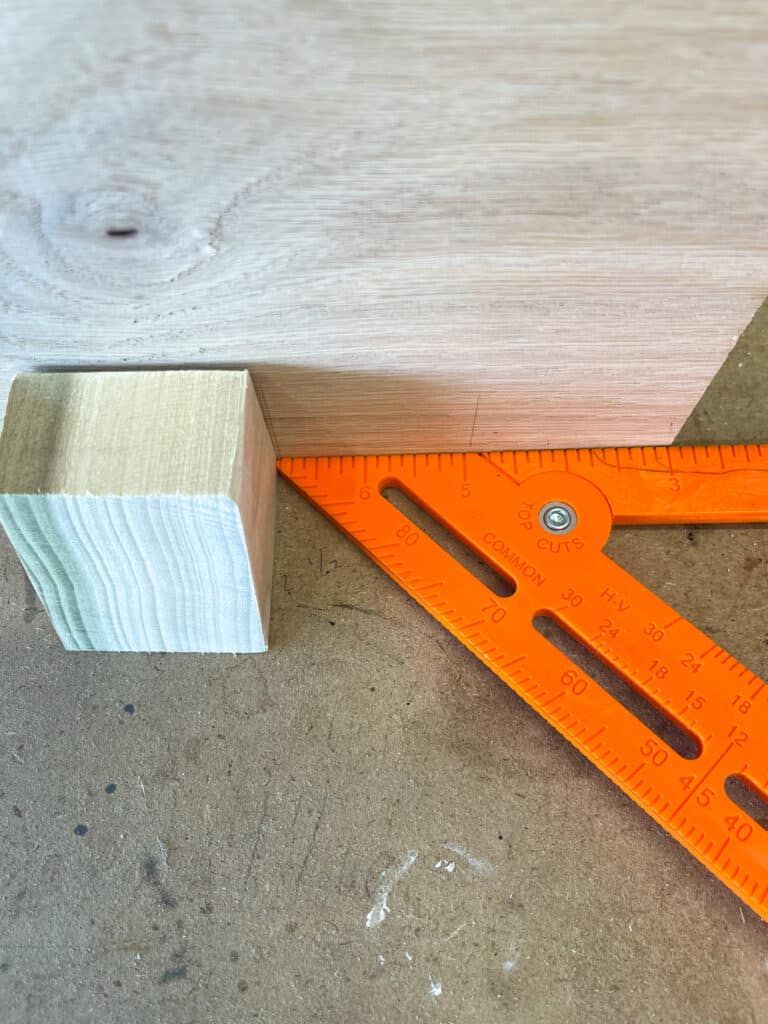
Take your 2x2x3 and cut the angle first, I adjusted my saw to be at 22.5 degrees bevel cut. A bevel cut changes the vertical angle of the blade. Now that you cut your angle, measure from the tip of the 2×2 and measure down 1.5 inches. Do this a total of two times, to create two corbel feet.
As for the bracket you are going to want to take your 1/4x2x2 or some scrap plywood and trim it down to line up with the width of your corbels. You want the height of your bracket to be about 4 inches. This gives it enough space to drill into but short enough that it’s easy to hide.
The measurements for the brackets should be 1.5 inches wide x 4 inches long. If you ended up finding a 2x2x3 poplar board like I did that was exactly 2×2 then your measurements will be 2 inches wide x 4 inches long.
Step Two: Sanding
Next step, you want to sand all your pieces. Don’t be like me and sand after everything is assembled. It made it hard to sand the whole piece without doing some twists and turns to get in all the tight spots.
I personally used 120 grit with my handheld palm sander to get everything down to a smooth finish.
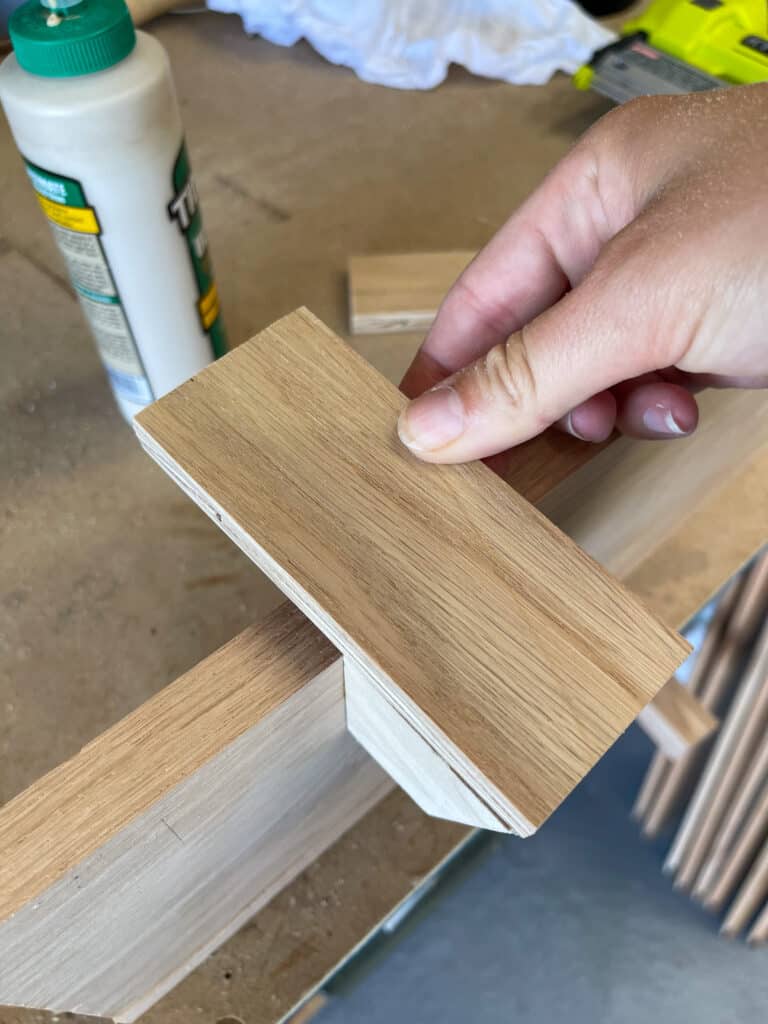
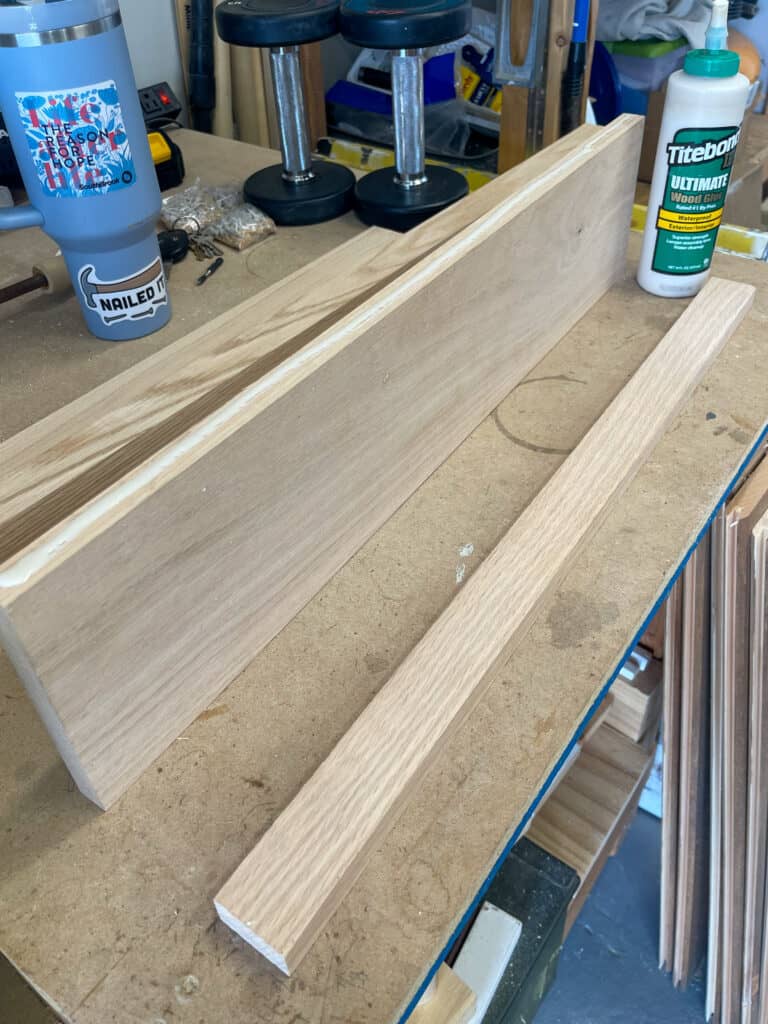
Step Three: Assemble The Shelf
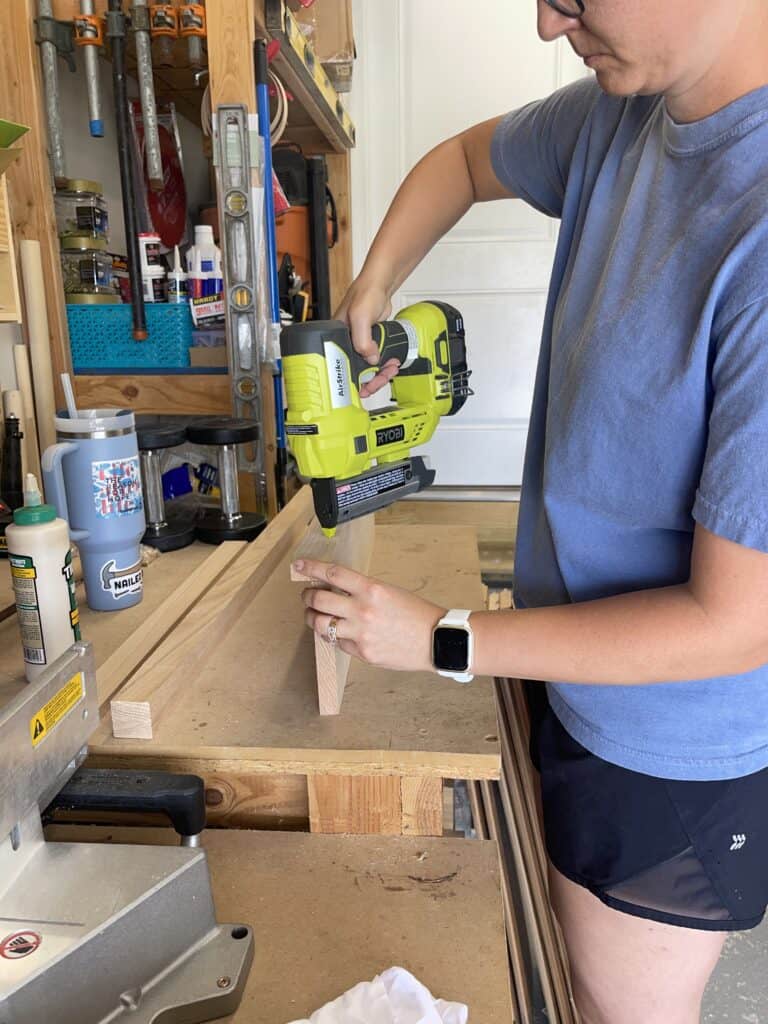
Grab your 1x6x2 and your 1x2x2 and line them up against each other. Using a small bead of wood glue and your nail gun to assemble the pieces together. If you have a pin nailer I highly suggest using it for this step!
A pin nailer has 23 gauge nails and the hole is almost non-existent to the eye. If you don’t own one, using a regular brad nailer will do just fine.
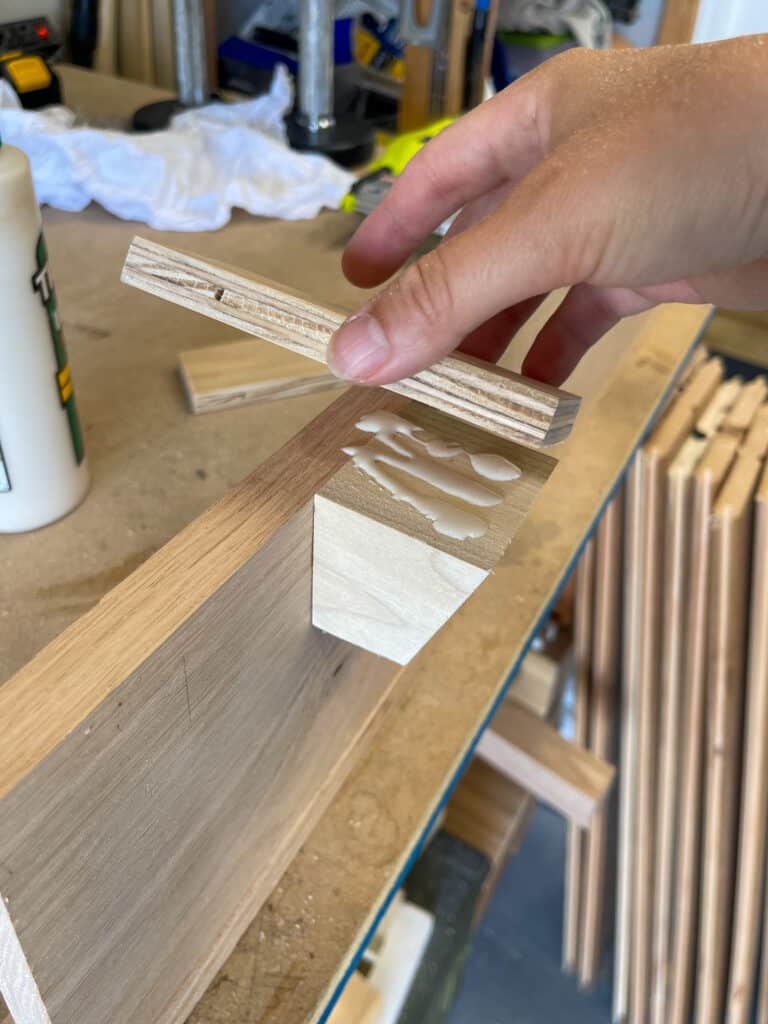
Step Four: Add Corbel Feet To Shelf
Start off by measuring in 3 inches on both sides of the bottom of the shelf. Your corbel feet will have the angle cut in the front. Have one flat edge touching the bottom of the shelf and another flat edge that goes against the wall. Like the shape of an L.
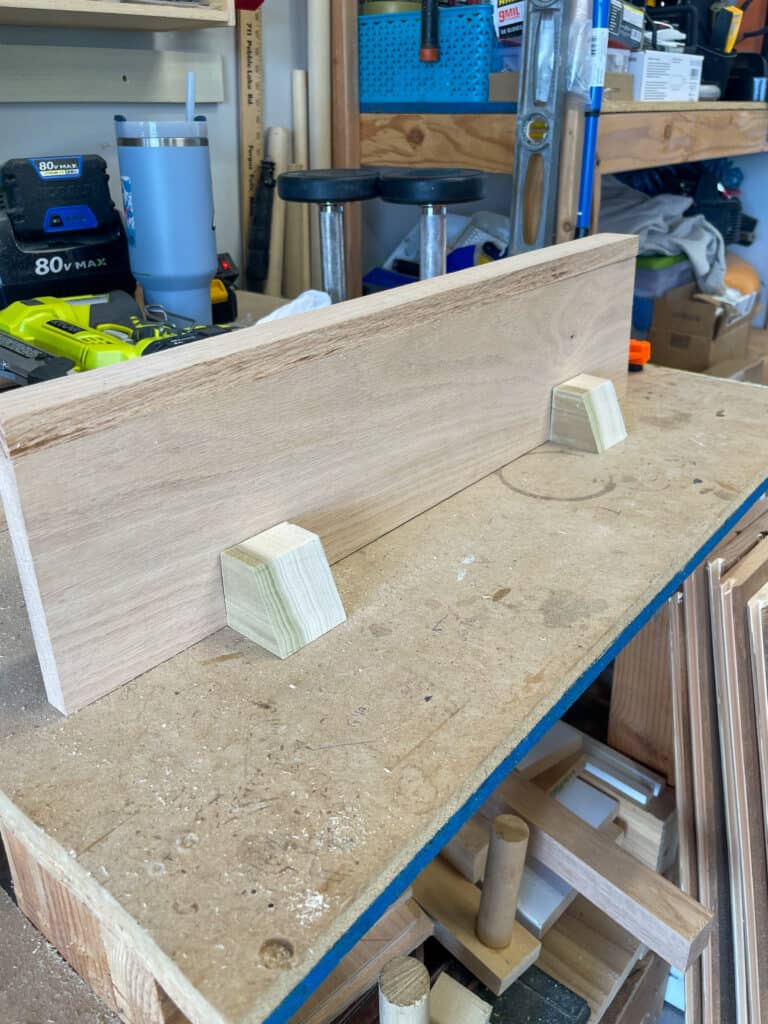
To attach the corbels you will need your wood glue and nail gun. Put a generous amount of glue on to the side that will go up against the shelf. Once against the shelf take your nail gun and nail from the top of the shelf down into the corbel feet. Do this for both corbels
Step Five: Attaching Shelf Hanging Brackets
With all the corbels attached you will need to attach the back hanging brackets. Flip your shelf over and add some wood glue to the back of the corbel. Place the bracket right on top and nail in place with your brad nailer.
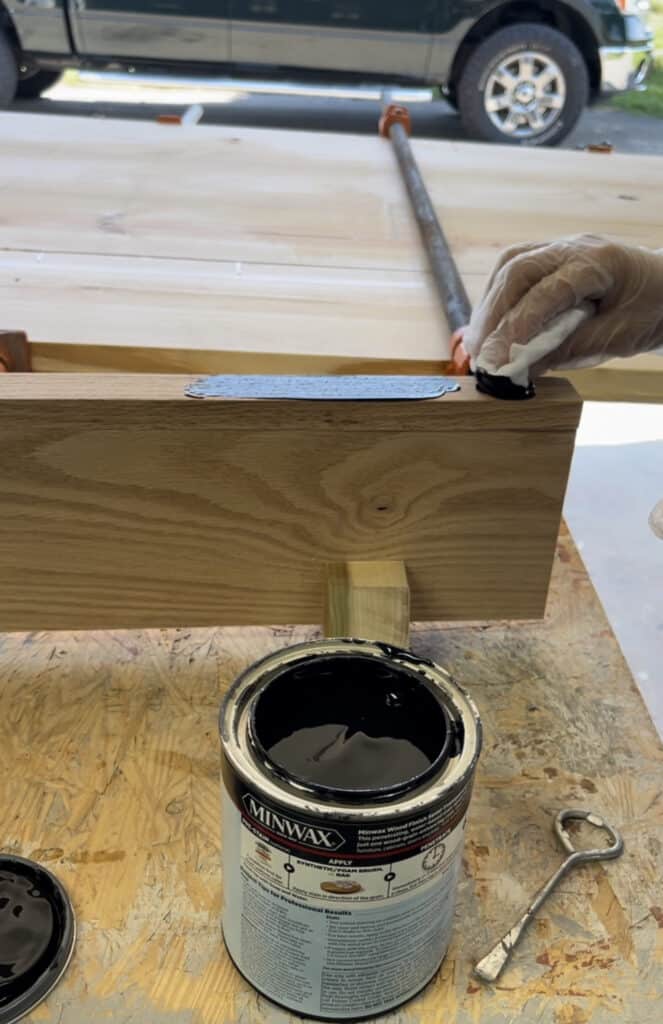
Step Six: Stain Your Shelf
Now for the fun part, finishing your shelf! Make sure before staining you need to fill any nail holes that you can see. Once dry, run 120 grit sandpaper over the shelf one more time. Wipe everything down to remove any dust.
Using your pre-stain wood conditioner, go over the entire shelf. Wood conditioner is specifically designed to use before staining to help prevent streaking and blotching. It will help ensure a beautiful and even stain.
After you apply the wood conditioner you don’t need to wait to stain. I always jump right into staining and never have any problems.
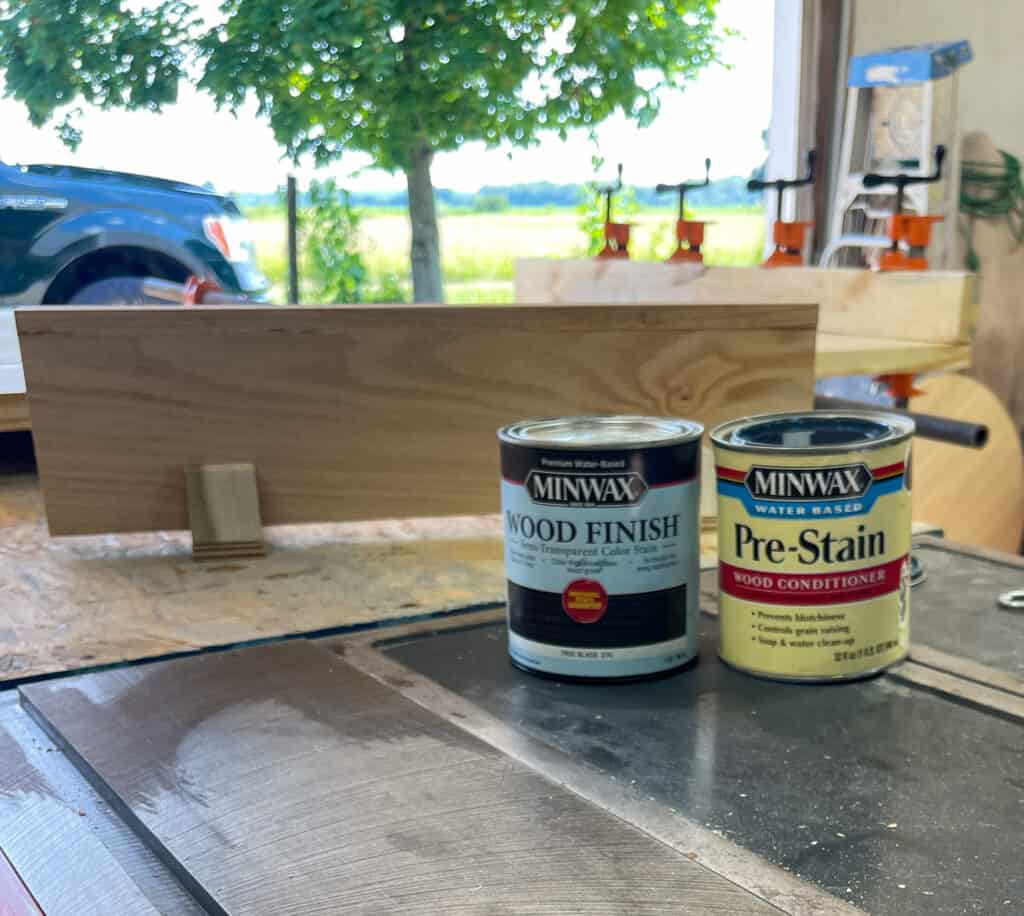
The stain I used was True Black Semi-Transparent Water Based Stain from Minwax. The stain is water based instead of oil based, make sure your wood conditioner matches to whatever base you are using.
If you want to seal it, to protect it from UV rays and any moisture I recommend using Polycrylic Protective Finish. You can buy the can version or they do have a spray can version that makes it super easy to apply!
There you have it, you built your very own corbel shelf! To attach it to the wall take your countersink bit and drill pilot holes for your 2 inch screws. If you can’t find your studs in the wall make sure to use anchors.
I would love your feedback on this tutorial! If you built the shelf feel free to send me a picture. Just send me an email at [email protected] or DM me on Instagram! Happy building!