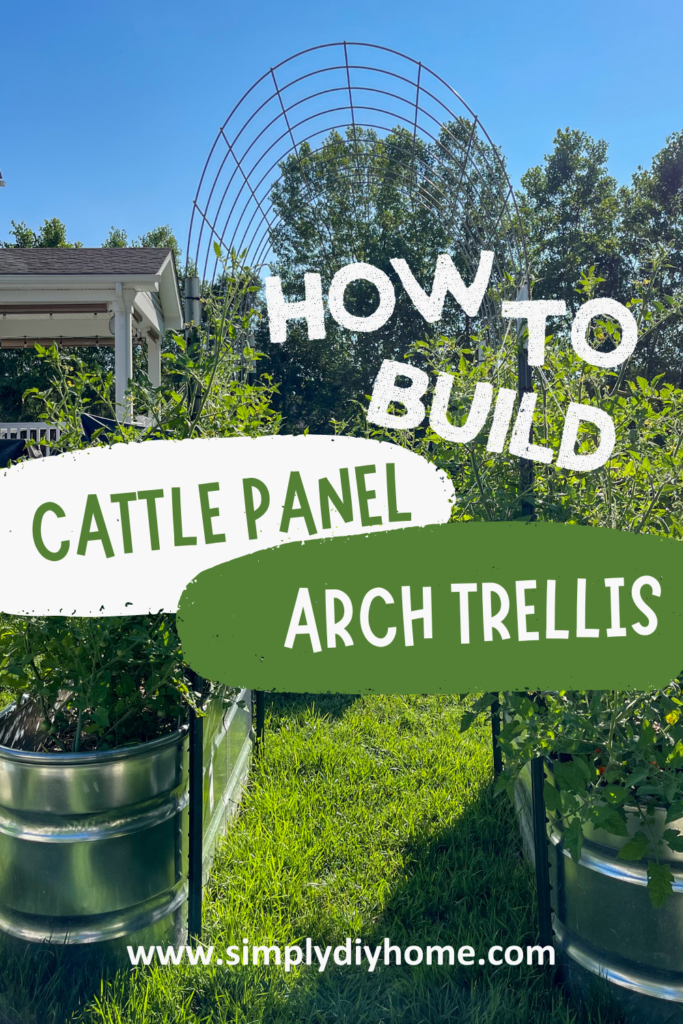
In this post, I’ll walk you through the process of creating a cattle panel trellis arch! This arch is sturdy and yet surprisingly easy to build. Follow along for a step-by-step guide that will transform your garden into a beautiful and practical space.
Do you have a small garden layout but want to grow more produce? Or maybe you have a huge garden and you want to have more vertical growing space but on a budget! Either way I’m going to show you the best way to gain vertical gardening space in your garden without breaking the bank.
If you are new to gardening you can check out my article- Tips To A Successful Garden. I share my experience and what I have learned over the last 4 years of gardening!
[AFFILIATE LINKS ARE PROVIDED BELOW FOR CONVENIENCE. FOR MORE INFORMATION SEE MY DISCLOSURE HERE.]
Materials Needed
It doesn’t require a lot of supplies to build an arch trellis, all you need is the 4 items listed down below:
- 16 FT Long Cattle Panel (you can find these at most farm supply stores)
- 4 T Post (6-8 FT Tall)
- Heavy-Duty Zip Ties
- A Sledgehammer or Post Driver
The hardest part of this project is getting the panel home. If you have a truck the best way to do it is to arch it in the bed of the truck and strap it down with tie-down straps. If you don’t have a way to transport it you can see if the store delivers or you can rent a truck from Home Depot or Lowe’s and do it that way.
How To Build A Garden Arched Trellis
Building a cattle panel garden arch can seem like a big project, but I promise it’s simpler than it looks! Here’s how you can install one in your garden and add that spectacular touch to your growing space:
Step 1: Position Your T-Posts
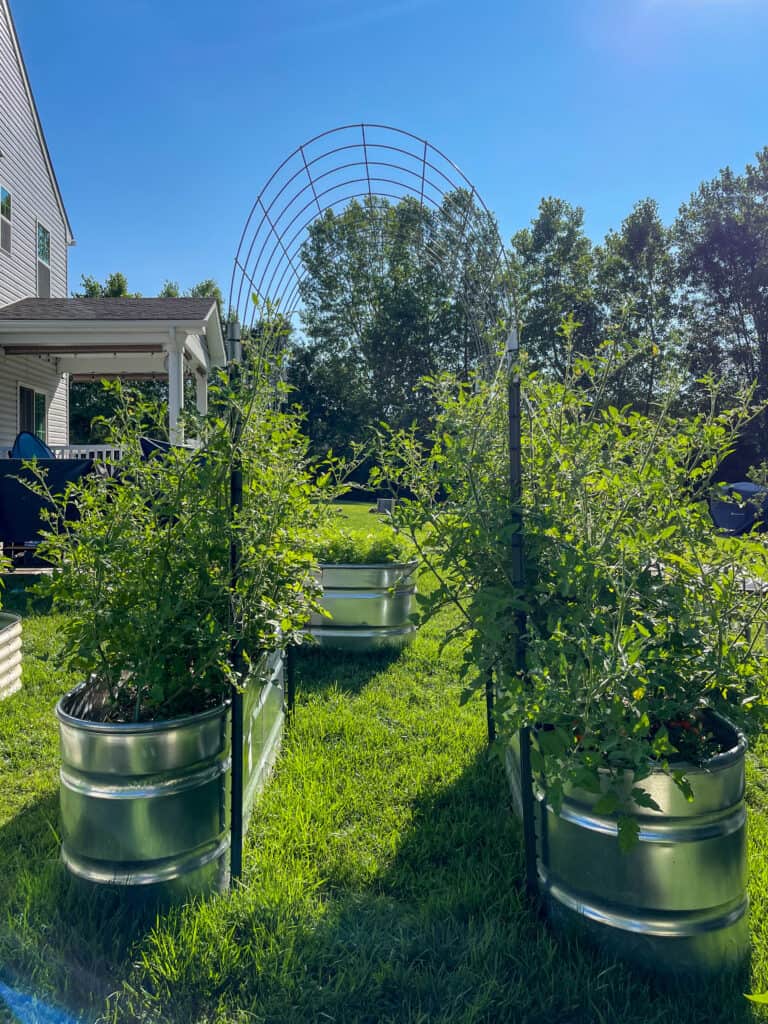
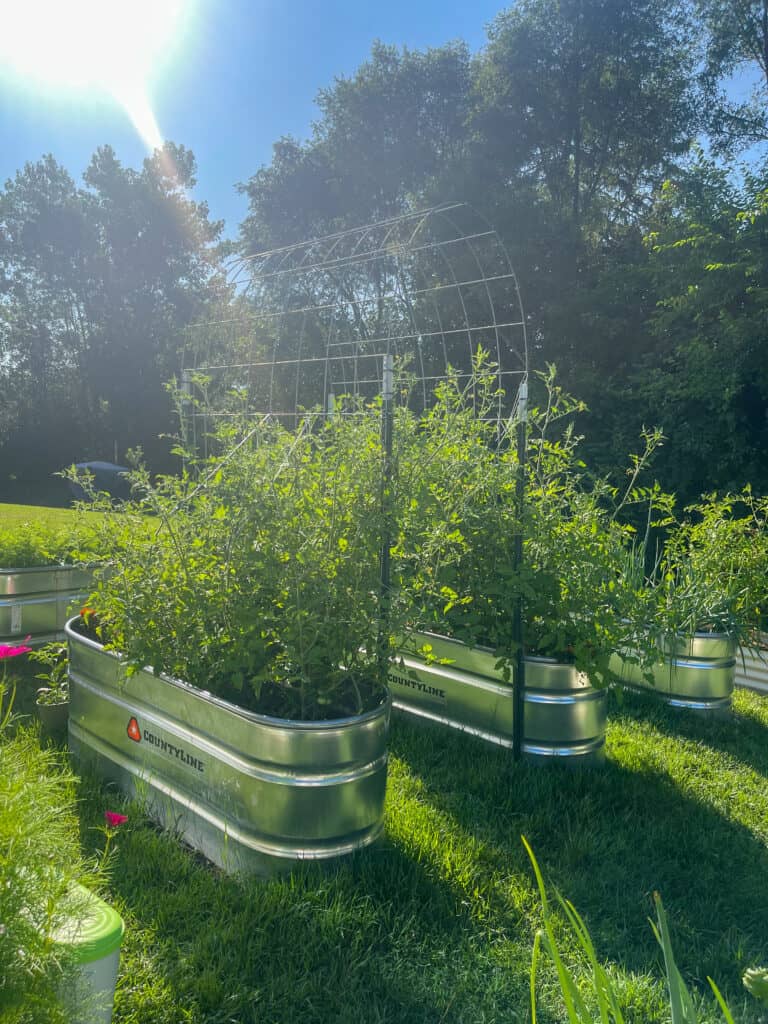
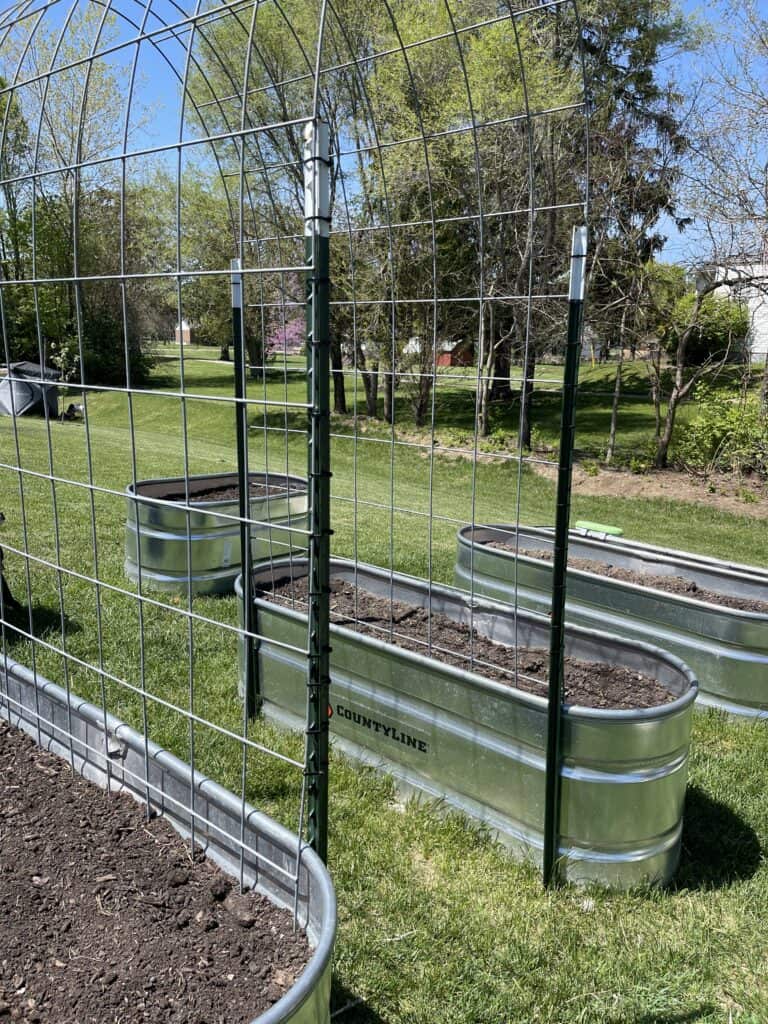
Choose the location for your arch. It should be level and clear of any large roots or rocks. Hammer a T-post into the ground at one end of where you want your arch to start. Repeat this step on the opposite side at the same distance the cattle panel is wide.
Then, do the same for the other side of your cattle panel, creating two parallel lines of T-posts.
Step 2: Bend the Cattle Panels into Arches
For this step grab a buddy, it makes it easier!
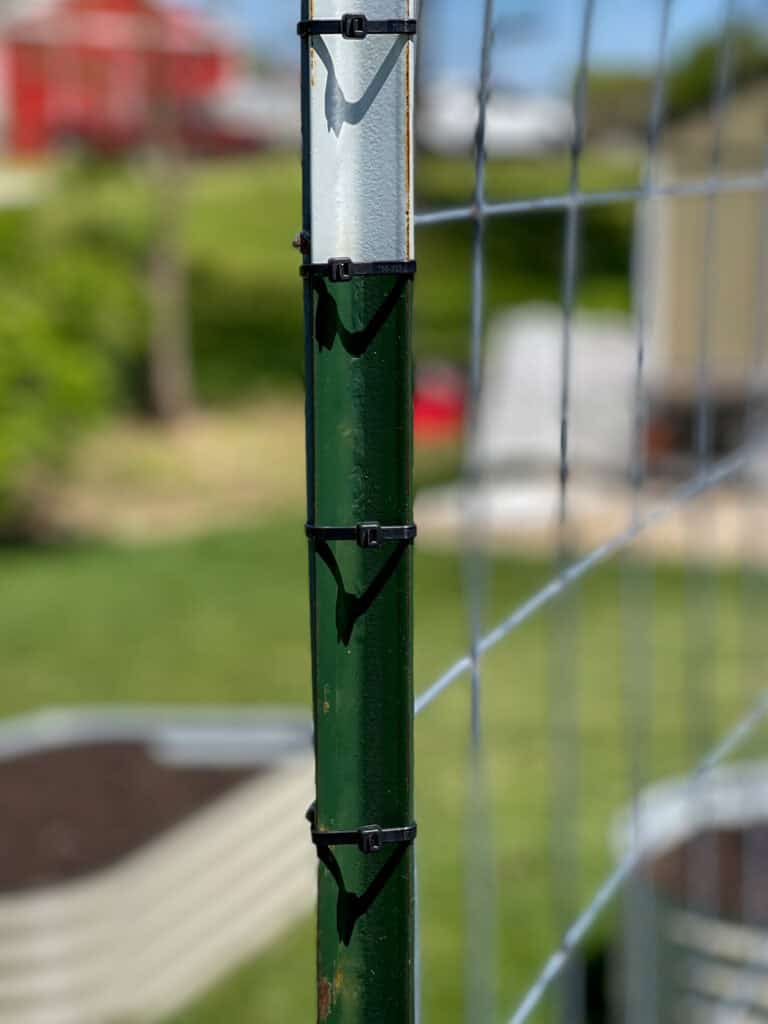
Stand one cattle panel up on its narrow edge, once you secure it to your first two t-post gently bend it to form an arch between the opposite side of T-posts. The ends of the panel should touch the ground near the base of each post. Secure the panel to the T-posts using heavy-duty zip ties at several points to ensure stability.
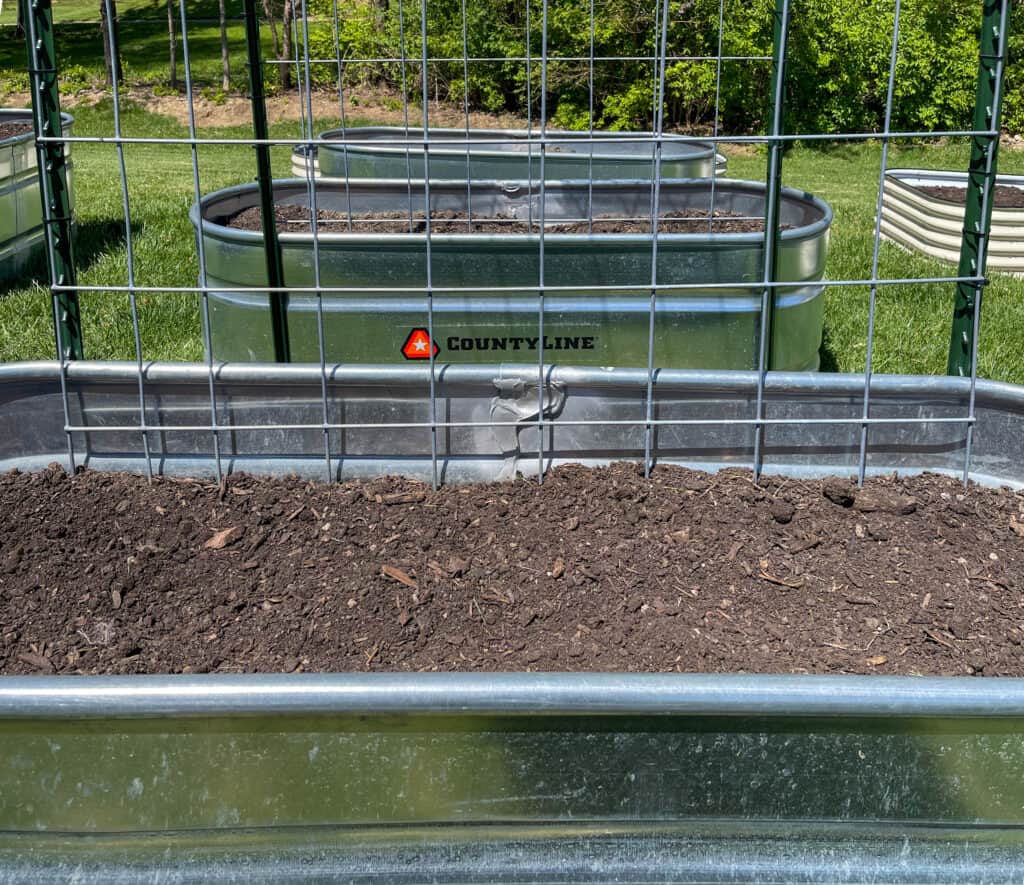
Depending on where you are installing your panels depends on how far apart you install your arch. For us I was installing the arch in our water trough garden beds. Since this arch was an afterthought we pushed the panel down in the bed instead of installing it on the outside.
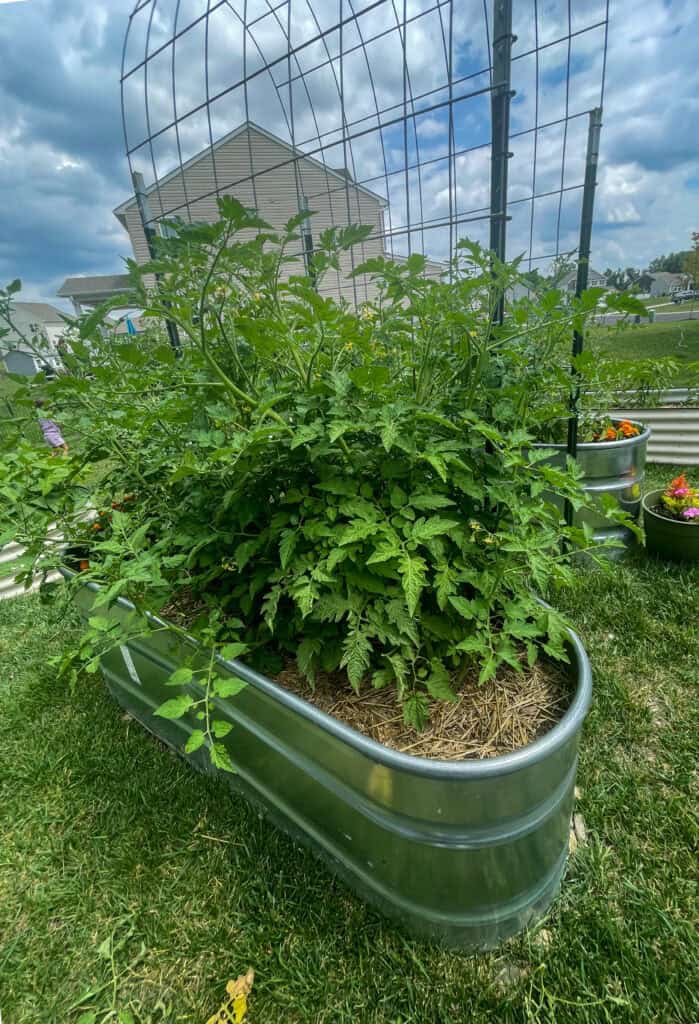
What To Grow On Your Cattle Panel Trellis
Now the fun part begins! Plant your climbers—such as pole beans, peas, cucumbers, melons or even cherry tomatoes—at the base of the arch. As they grow through the season you will have to train them a little bit to go up and over the arch. I used garden twine last year to tie my tomato vines to the panel to help them.
This year I’m thinking of growing mini melons and will use these melon hammocks to support the melons as they grow!

This project is one of my favorites because it’s straightforward yet impactful! Plus, it’s always satisfying to see your plants thriving on the structure you built with your own hands. Do me a favor, if you add a cattle panel to your garden send me a picture, I love seeing other gardens.
Happy gardening!
[Safety is of great importance when working on DIY projects. Always follow proper safety guidelines, wear appropriate personal protective equipment, and adhere to local building codes and regulations. READ MY FULL DISCLAIMER HERE.]