
Today I am going to go over our DIY Shiplap Electric Fireplace. I’m going to give a run down on the how-to build an electric fireplace and what insert I highly suggest!
When moving into our new cookie cutter builder grade home I knew I had to have a fireplace. I wasn’t willing to pay for the gas fireplace the builders offered because it wasn’t what I envisioned. From the time we signed the contract to build this house I knew we were going to build one ourselves!
Our home in Texas had a gorgeous fireplace and part of me was missing that part of our home we left behind. I needed a place to decorate and hang our stockings.
With our new build we were definitely going to have a smaller living space than we did in Texas. (it’s true everything is bigger in Texas) So i knew as much as I hated mounting a tv above a fireplace we had no choice if I wanted to maintain that open and less cluttered floor plan I envisioned.
Let’s get started and right into the most asked questions!
DISCLAIMER: Since writing this I have had even more questions! You can read those questions at DIY Shiplap Electric Fireplace: Most Asked Questions!
Can you build your own electric fireplace?
YES! Short and simple answer!
The hardest part of this build is just figuring out where you’re going to build it. How wide your going to make it and making sure you build the frame correctly to support a mantle, tv and insert.
When designing this fireplace I knew it needed to be wide enough for my husband’s 65 inch tv. I needed the size to be proportional for the tv, mantle and fireplace insert. I spent hours on Instagram, Pinterest and fellow DIYer’s blogs making sure I accounted for the space between the mantle and tv. I had to make sure we had enough room on either side of the tv itself so it didn’t look like the tv was to big for the space.
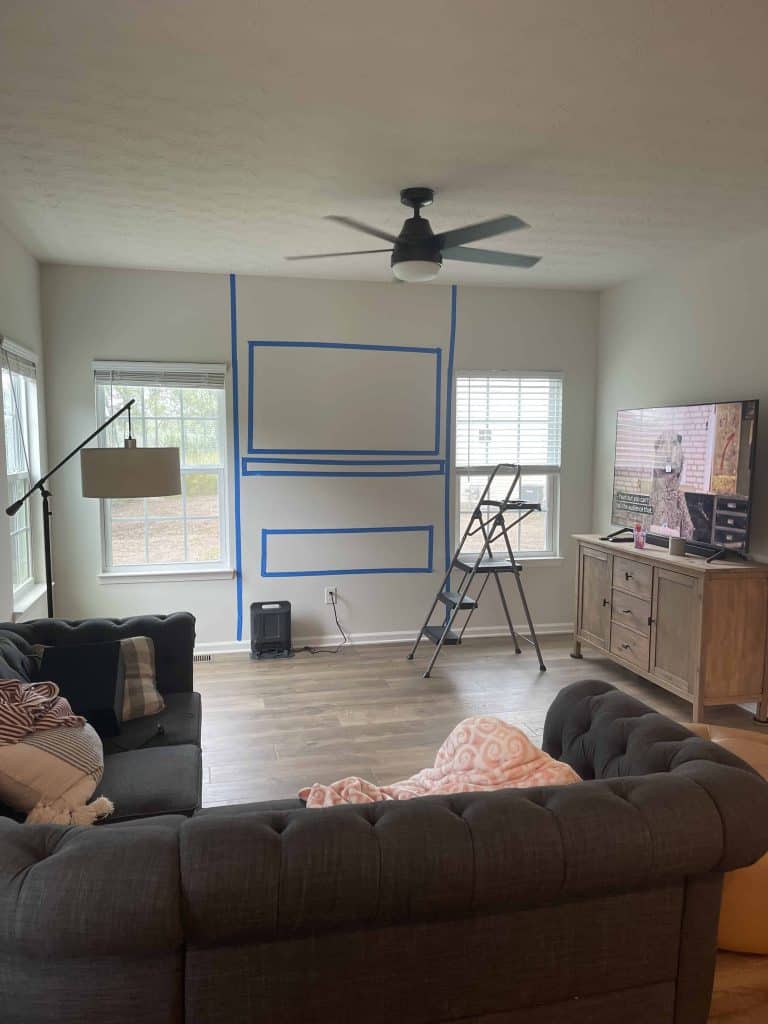
As you can see I had taped out the tv, mantle and fireplace itself to see where we wanted it to be. It’s very important that you have an electrical plug-in behind your frame so you can actually plug in your electrical fireplace insert, tv and any cable boxes you own.
How much does it cost to build a DIY shiplap electric fireplace?
This is a very important question I got asked over on Instagram. For our shiplap electric fireplace it cost us roughly $1000. To me it was well worth it! The gas fireplace the builders offered us was about triple that and no where near the size we built ours.
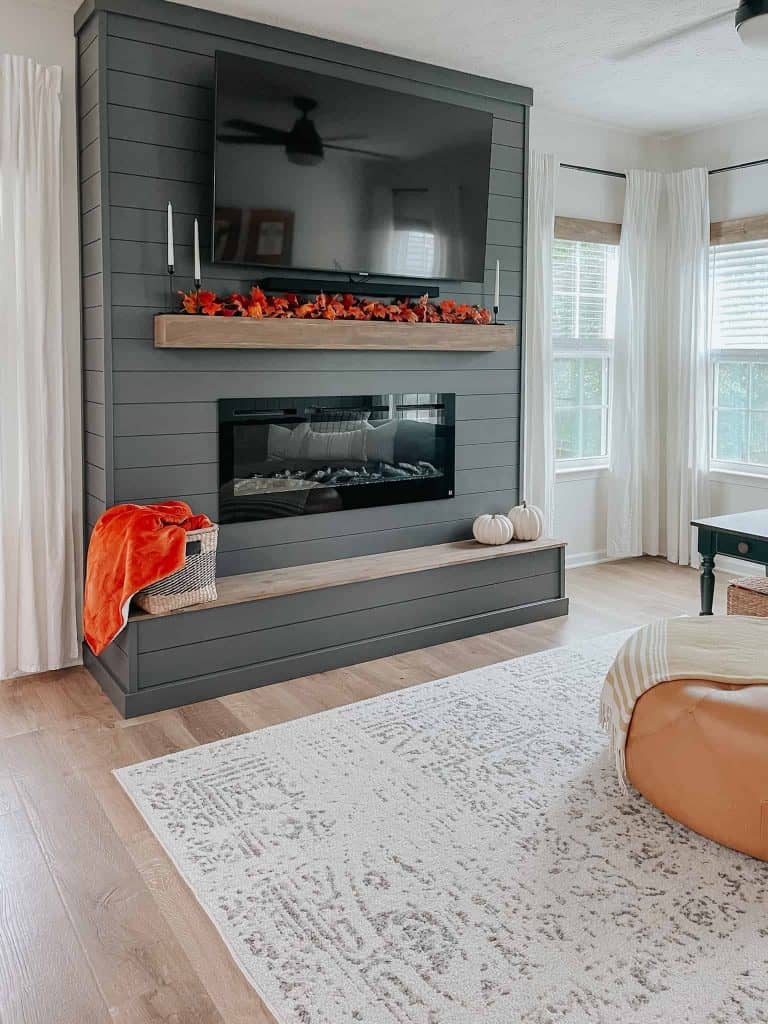
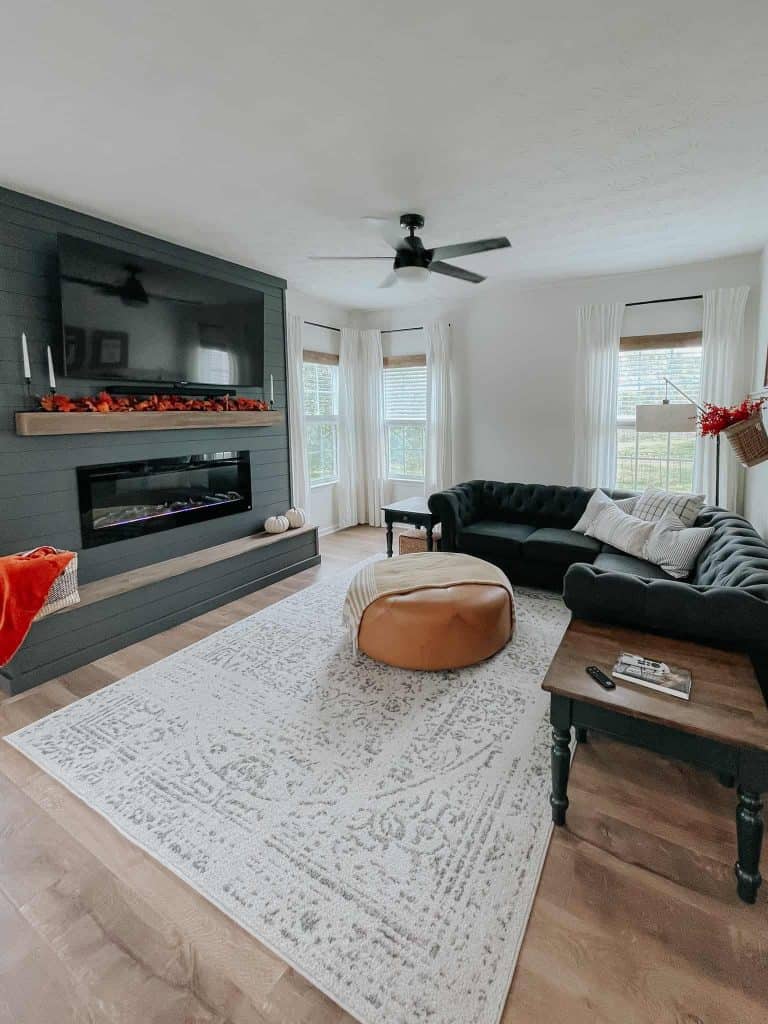
Price will vary due to size of your fireplace and depending on the economy at the moment. The width of our fireplace is 79 1/2 inches by 9 ft tall. The fireplace comes 13 inches off the wall and the hearth comes 25 inches off the wall.
The Materials was about half of the budget with our Touchstone Sideline 50 Recessed Electric Fireplace being the other half. Out of all the inserts I came across I was happiest with the company Touchstone due to the fact their inserts were realist and emit heat. Not to mention the shipping was fast and free! (this blog post is not sponsored in anyway & these are my actual thoughts & feelings about these products)
Materials List
- (30) Tongue and Groove Shiplap
- (4) 2 in x 4 in x 10 ft (framing)
- (18) 2 in x 4 in x 8 ft (framing)
- (3) 1 in x 4 in x 8 ft mdf (trim pieces)
- (3) Lattice trim moulding
- (3) Inside corner trim moulding
- Finish nails
- Wood filler
- Kreg Jig screws (optional)
- Construction strews
- Caulk Gun
- Caulk
- Paint- I went with Sherwin Williams Peppercorn
- Fireplace insert– I chose TouchStone The Sideline 50″
[AFFILIATE LINKS ARE PROVIDED BELOW FOR CONVENIENCE. FOR MORE INFORMATION SEE MY DISCLOSURE HERE.]
Tools List
- Miter saw
- Cordless drill
- Nail Gun
- Level
- Stud finder
- Paint brush
- Roller
- Foam rollers
- Paint tray
- Kreg Jig (optional-but highly recommend)
Download our DIY Fireplace Frame Plans!
UPDATE 1/5/23- I have finally came out with printable plans for the fireplace frame build to make constructing the frame easier for you! Click the buy button up above to purchase or read more of what’s included in this post DIY Fireplace Frame Plans!
DIY Electric Fireplace Tutorial
Now that you have your supplies & tools we can get to building! I was originally inspired by Micheala over at michealadianedesigns.com! You can find her electric fireplace tutorial HERE! Honesty her step by step guide is spot on and will be a great addition to my tips & tricks. So make sure you check her post out too so you get the most information possible!
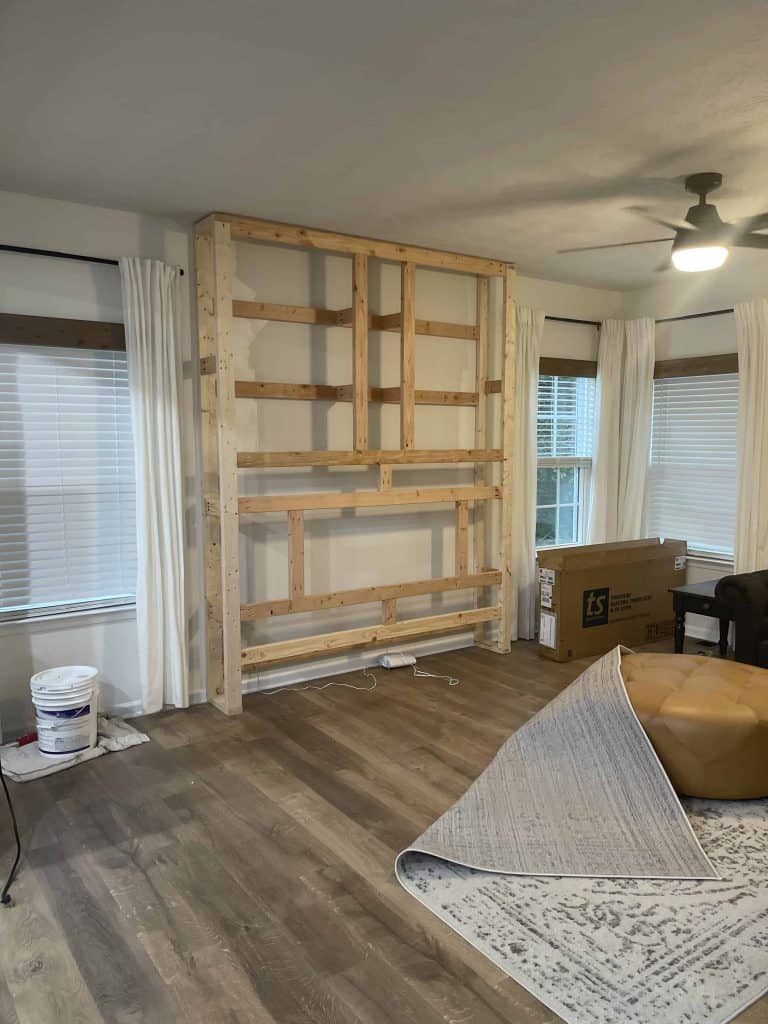
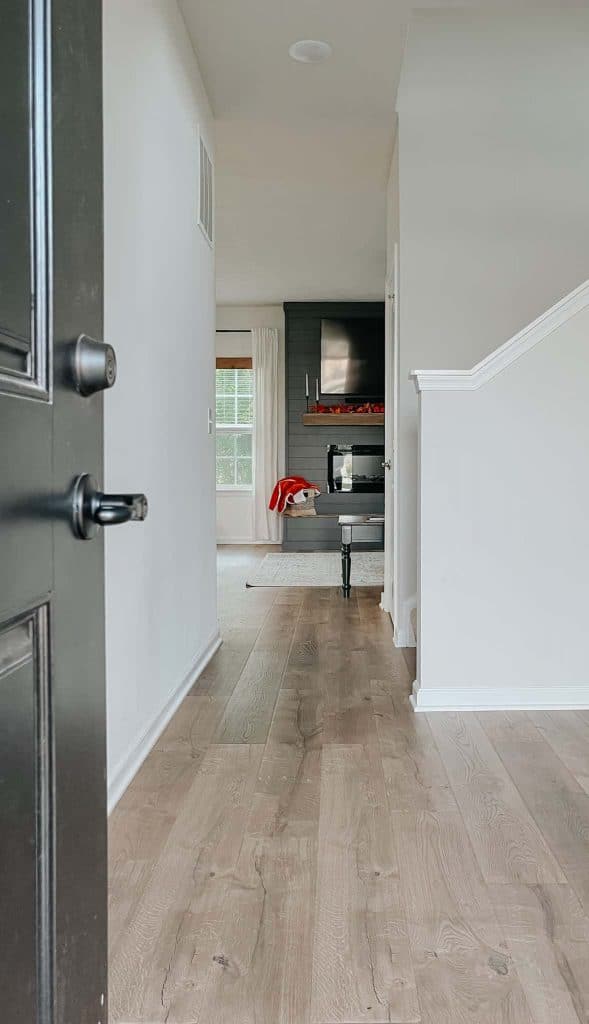
Down below is a BEFORE photo of where we started.
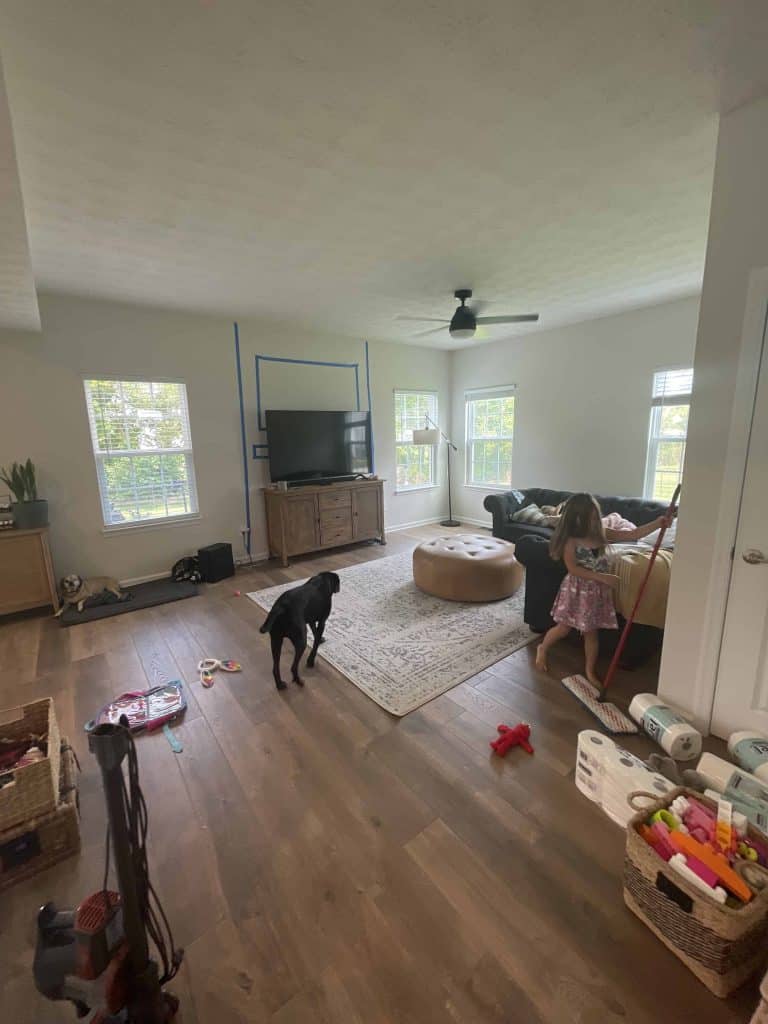
To begin we moved everything out and away from the wall and measured in between our two windows to find our center point. From there you want to mark out either with tape or a pencil where you are placing your fireplace.
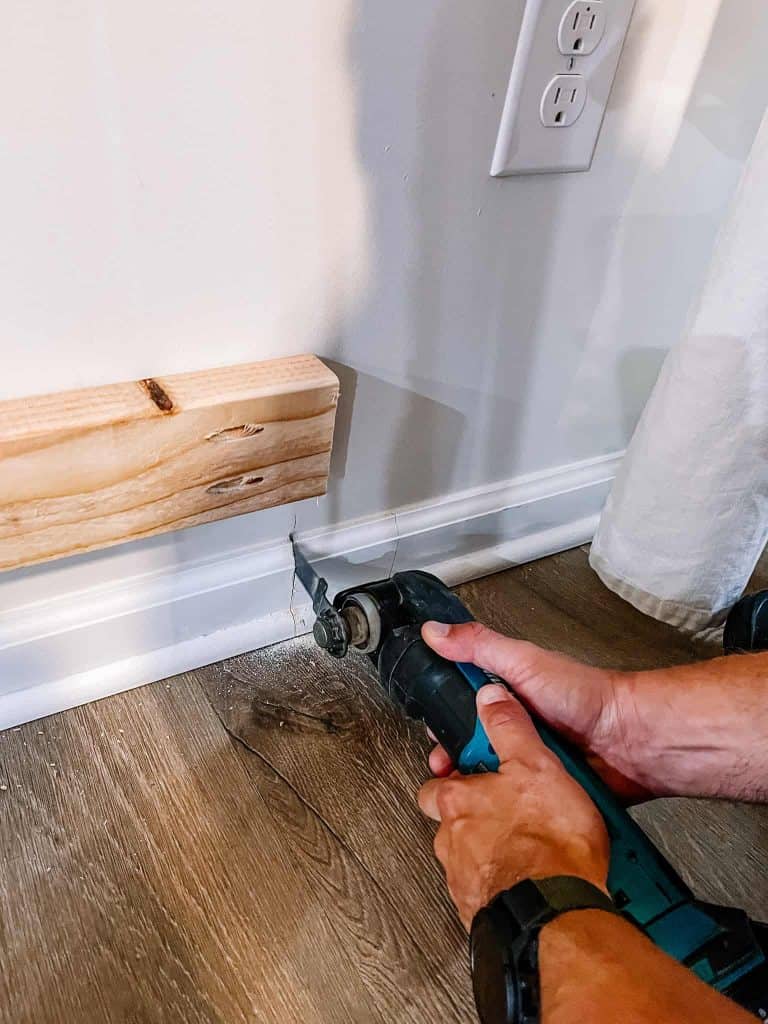
To start off we knew we wanted an outlet behind the frame so we didn’t have to complicate the build by making a cutout for cords. We marked our studs so we knew where to drill for the frame so it would be secure. Instead of taking the whole baseboard off we just used our oscillating tool and cut a spot for the 2×4 to fit into. If you’re still building your DIY tool collection check out my must-have power tools for home DIY.
Next step was to build our frame! This part was mostly my husband. Down below I have photos of the process as we went along. Overall you want to make sure your side walls are drilled into the studs. When cutting the 2×4’s for your height make sure you’re leaving about 1/2 inch wiggle room for expanding and contracting.
Wood tends to getting bigger and smaller as the seasons change.
We chose to use pocket holes with our Kreg Jig for assembling the actual frame. Pocket holes are actually stronger than a butt joint where you just butt the ends up next to one another. We figured better safe than sorry with having two little kids!
Assembling the Front Frame
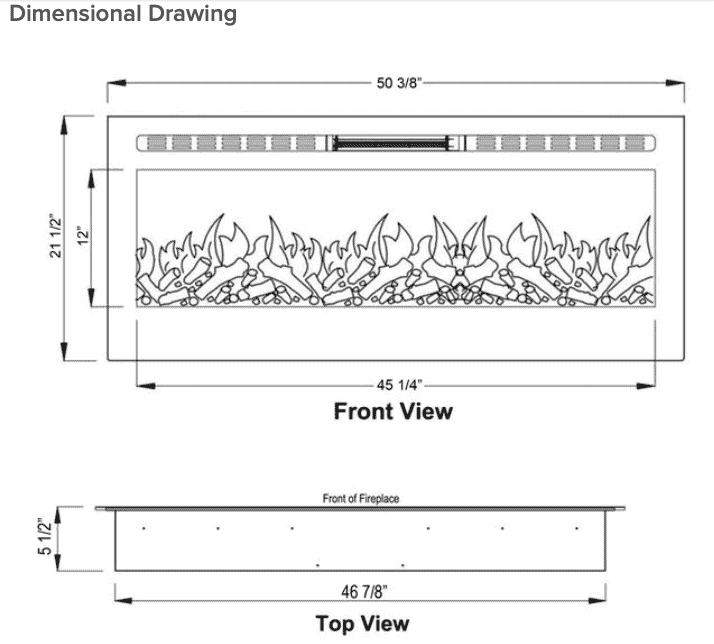
Assembling the front frame of the fireplace is where I handed it over to the engineer of the house! You have to create support pieces to support the fireplace insert so it has something to hold it up. The boards will be what you screw your fireplace insert into.
This is also really going to depend on what insert you buy. If you go with TouchStone Home Products like we did then it should be pretty simple. They have dimension drawings of all their inserts and rough opening measurements for you on their website to help you. For our size fireplace we chose their Sideline series in the size 50″.
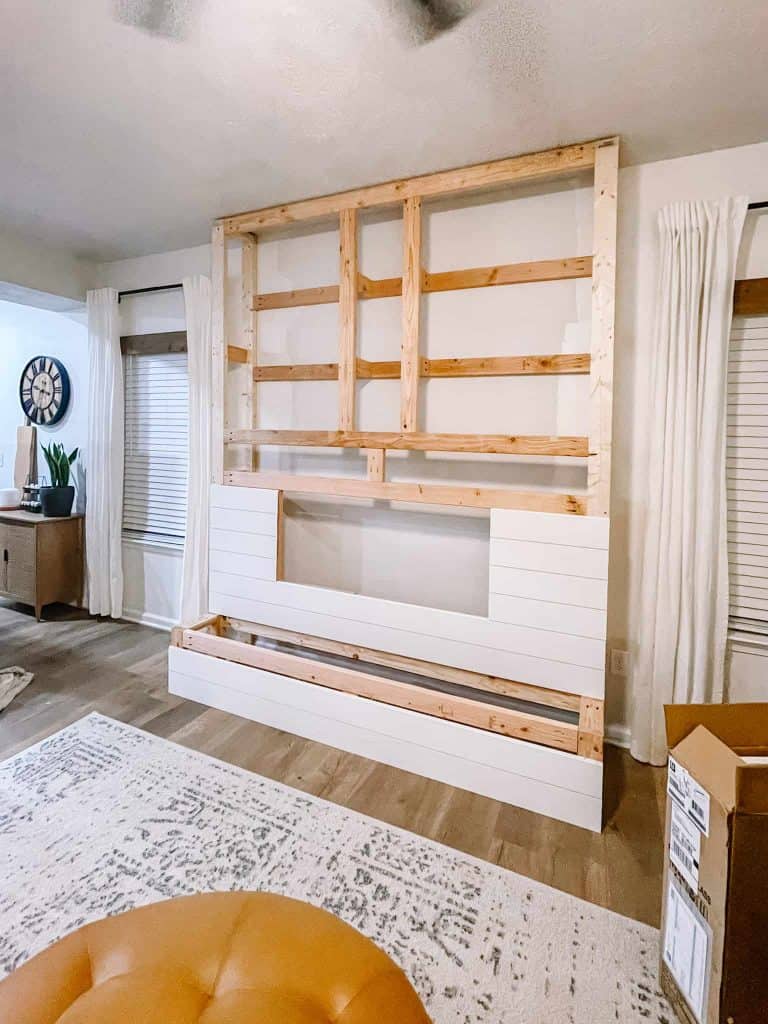
When assembling your front frame make sure you add 2×4’s for mounting your tv and mantle to make it easier on you.
Installing Shiplap
We chose to install tongue and groove nickel gap shiplap. You can buy this at almost any hardware store like Lowe’s or Home Depot. This in my opinion is the easiest route. I was able to install all the shiplap boards after my kids went to bed at night. Once you get going it’s smooth sailing.
There are many ways you could do shiplap and one of the cheaper options would be 1/4 inch underlayment plywood. With this option you would have to have the boards ripped down to your desired width. A table saw would be the most handy going this route.
The only thing with plywood is it wouldn’t be as strong as using the tongue and groove in my opinion.
Some of my top tips for installing shiplap I have listed below.
- If you know what color your painting your fireplace please please please paint your grooves before installing the boards!! I have forgotten to do this with every wall I have installed in our new home & I kick myself every time. It will seriously save you hours of tedious work.
- Make sure you are leveling that first board when you install it and every few boards use the level again. This is important because you don’t want to get to the top and stand back and notice your boards are unlevel.
- Make sure your boards are even and lined up on the ends so it gives it a smooth surface to install those corner pieces. Trim pieces are going to be your best friend in making everything come together!
- Last but not least my last tip is when nailing the boards into your studs nail into the tongue of the board. You will save yourself from filling that many more nail holes. I see a lot of people don’t do this and I don’t understand why more people don’t take advantage of this tip!
RELATED- Not sure what paint finish to choose for your project. Read my CHOOSING THE RIGHT PAINT FINISH guide to learn all about finishes.

DIY Fireplace Mantel
Building a mantel is super easy. Essentially it’s a giant floating shelf. I didn’t include the wood for the mantle in the material list but I typically use select pine wood and use my favorite stain combo. Early American & Briarsmoke.
You can read the full tutorial in this article- How To Build a DIY Mantel Shelf. I go through the whole process, break it down into easy simple steps, and answer most FAQ from Instagram.
Wire Management & TV Mount
As for managing your wires and tv boxes we have that all in the inside of the frame. For the tv wires we drilled a hole in the shiplap and fed the sound bar and tv cords through it to the power strip we have mounted on the wall inside the fireplace. Some people like my friend Micheala made a handy secret door on the side. That way everything was easy to access.
We actually added the hearth to our fireplace build because we will eventually turn the top of the hearth into a toy/blanket storage space. That is also where we can see and get to our apple tv and the outlet behind the fireplace. For now we just have the wood sitting there. All we have to do is get a hinge to install to make it where it opens and closes.
Lastly for the tv we just got a tv mount from Costco and mounted it to the 2×4’s under the shiplap. If it bothers you how high the tv is like some people mentioned on Instagram then you could easily buy a mount that allows you to pull the tv down a little for easier viewing.
The size of your tv and the fireplace insert is going to play a big part on where your tv sits on your fireplace. Because the electric fireplace insert emits actual heat there are requirements of how far the mantle, tv and the floor have to be for safety reasons. We have 9 ft ceilings and a 65 inch tv so it didn’t leave us much room. Especially since we added the hearth for extra storage we had to account for that in our measurements.
I hope I answered all the questions that you had on achieving this DIY electric fireplace.
Between all the information and the wonderful tutorial my friend over at michealadianedesigns.com has you should have enough inspiration to get started on your own fireplace.
If you attempt this build I would love if you would DM me over on Instagram and share your photos with me! I’ve already had a few of you share your fireplaces with me and it has me over the moon. Save this post over on Pinterest to reference back too. If I get new questions I haven’t went over I will add them to this post over time!
I would LOVE to see your plants to convert the hearth into storage. Are you going to be doing anything to the inside to finish it off? I’m planning to do a similar fireplace wall but we’ll lose storage from our current TV stand. It would be great to get some of that back via the hearth!
Thank you for sharing this! Excited to try and build this at our new home.
This is sooo helpful! Thanks so much for sharing! We plan to do this before the end of the year…so excited to make our house a little more cozy!
I am so glad we did this! I am enjoying it now that its colder.